
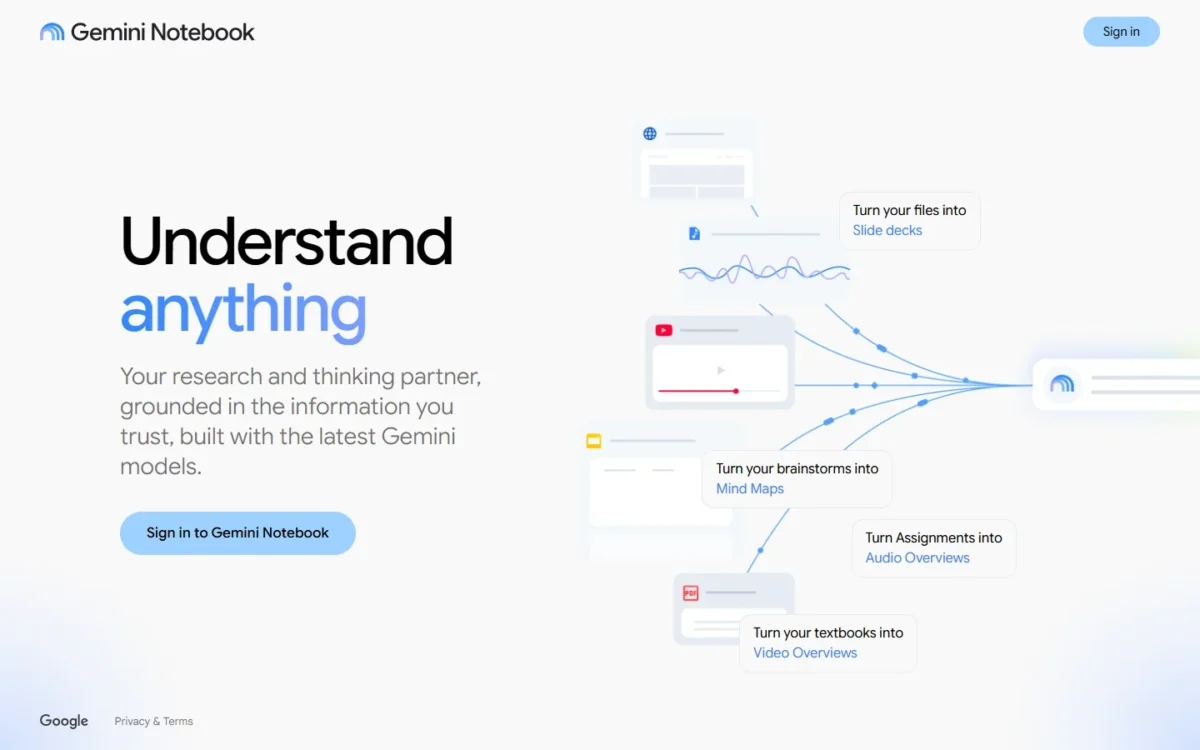
To use NotebookLM, sign in at notebook.google.com, create a notebook, add your own sources, then ask questions and turn the best answers into notes and Studio outputs. Google’s rename announcement settles the name: “We’re renaming NotebookLM to Gemini Notebook. It’s the same standalone product.”
A free account is enough to start, and the free limit to plan around is 50 sources per notebook. The guide suits students, teachers and team leads who want cited answers from their own files, and it covers the phone app and work or school accounts too.
- Task: build a notebook from your own sources and get answers with citations
- Result: sources in the Sources panel, a cited answer, a saved note, one Studio output, and a shared or copied notebook
- Prerequisites: a signed-in Google Account, a verified age, a supported country, and admin access for a work or school account
- Tools: a browser at notebook.google.com; the phone app is optional
- Limitation: chat answers come only from your sources, and free users can include up to 50 sources per notebook
In This Article (24 sections)
How Gemini Notebook Works
Gemini Notebook is an AI research assistant that answers from the sources you add, with in-line citations that point to the passage it used. A notebook is a collection of sources for one project, and one notebook can’t draw on another.
Each notebook has three work areas:
- The “Sources” panel holds your files, links and notes, each with a checkbox.
- The “Chat” panel opens with a generated summary, then takes your questions.
- The “Studio” panel generates outputs such as Audio Overviews, mind maps, reports, flashcards and slide decks.
Chat responses only use data from your sources, so a creative request can return “Gemini Notebook can’t answer this question.” That is the trade-off against a general chatbot: what you upload in Step 3 decides the answers more than any prompt.
Before You Begin
You need these before Step 1:
- A personal, work or school Google Account you are signed in to.
- A verified age on that account, and a supported country.
- A browser; Gemini Notebook supports 80+ languages.
- On a work or school account, an admin who has turned on access.
- One to three sources you have the rights to use.
Users under 18 get stricter content policies, and Deep Research, Slide Decks, Infographics and Cinematic Video Overviews are for users over 18. Workspace for Education is the access exception: it is available to users of all ages there.
Plan for generation waits: an Audio Overview may take a couple of minutes, and a Video Overview sometimes more than 30 minutes.
Step 1: Open Gemini Notebook and Sign In
Go to notebook.google.com and select “Sign in to Gemini Notebook” with the account that should own your notebooks. Choose deliberately, because personal and work accounts get different limits, sharing rules and data terms.
Expected result: you are signed in and can create a notebook.
Step 2: Create a New Notebook
Select “Create new notebook,” and a pop-up window opens to ask for your first source; leave it open for Step 3.
Scope the notebook to one project. Since a notebook can’t read another, keep material you want to question together in one notebook and unrelated projects apart.
Expected result: a new notebook with the add-source pop-up on screen.
Step 3: Add Your Sources
Select “Upload a source” in the pop-up, or “Add sources” on the left of an open notebook, and add files, links, Drive files or pasted text. A single uploaded file can hold up to 500,000 words or 200MB, free users get up to 50 sources per notebook, and there is no page limit.
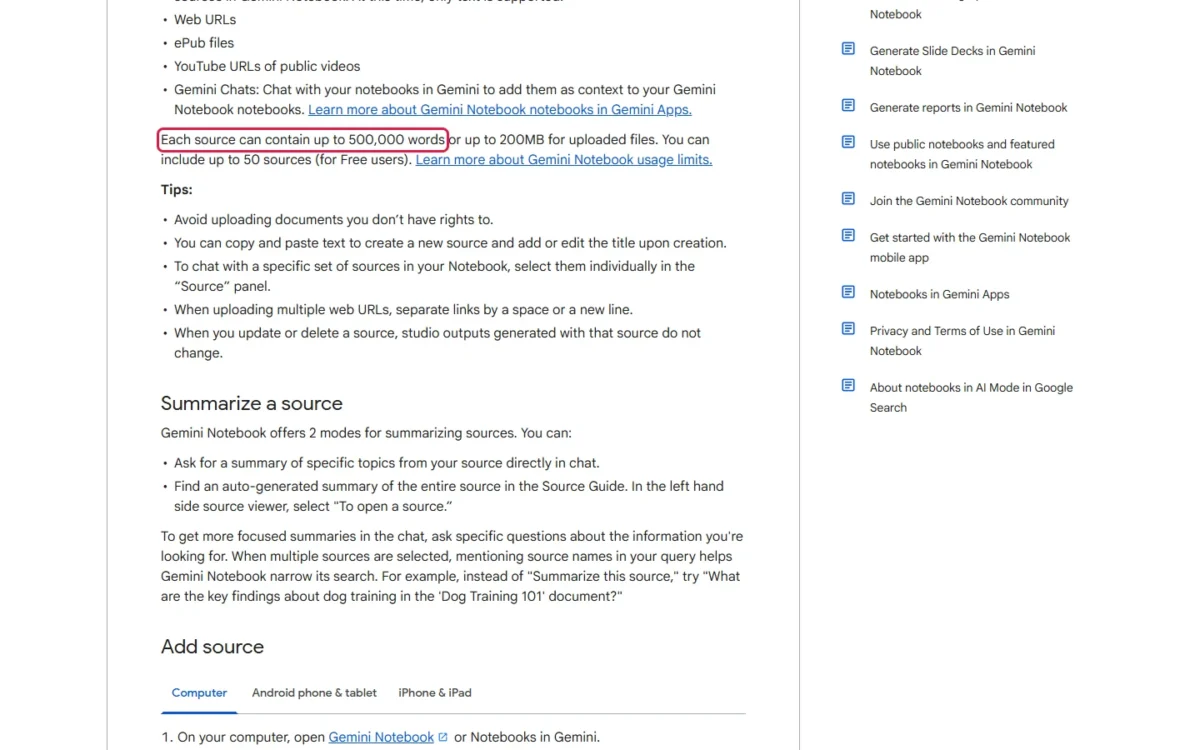
The 50-source cap shapes a free notebook. A semester of weekly readings can pass it, so split by course or project from the start.
Warning
A Drive file you lose access to, or that is deleted, becomes an inaccessible source that chat and Studio ignore, yet it still counts toward your source limit. Confirm you will keep access to shared files, or remove dead sources so they stop using a slot.
Expected result: your sources in the “Sources” panel and a generated summary in the “Chat” panel.
Files and pasted text
PDF, Word (docx), txt, Markdown, CSV, PowerPoint (pptx), ePub, images and audio such as MP3 and WAV upload directly. Google Docs, Google Slides (up to 100 slides) and Google Sheets (limited to 100k tokens) work too.
Audio is transcribed at import, so a file with no speech fails. To paste text, select “Add sources”, then “Copied text”; it is saved as a new note.
Web and YouTube links
A web URL imports the page’s text only, without images, embedded videos or nested pages, and paywalled pages fail. Separate several URLs with a space or a new line.
For YouTube, the captions are the source: only public videos with captions work, and only the transcript is imported. A video uploaded less than 72 hours earlier may not import, and one without speech fails. If the video is later deleted or made private, its source is auto-deleted from the notebook within 30 days.
Google Drive files
Drive imports stay tied to the original and sync every few minutes; to force it, open the source and select “Click to sync with Google Drive.” You need view access or more, your original Drive files are left untouched, and footnotes and comments are not imported.
Search for sources with Fast Research or Deep Research
Gemini Notebook can also find sources. For Fast Research, type a query in the Sources panel’s search box, choose “Web” or “Drive”, select “View” to expand the results and pick what to import.
For Deep Research, turn on both “Web” and “Deep Research”, then search: you get a report plus its sources to import. It is for users over 18, and “Cancel” discards every result not yet imported, so import first.
Step 4: Choose Which Sources the Chat Uses
Check the box next to each source chat should use in the “Sources” panel, and uncheck the rest. Chat uses either the full set or the subset you select, and unchecked notes are left out of chat and Studio generation.
This step decides what an answer rests on.
Expected result: only the checked sources feed your next answer.
Step 5: Ask a Question and Check the Citations
Type a specific question in the “Chat” panel, hover over a citation to read the full quote, and select it to open the passage in context. Naming the source in the question narrows the search, a habit my guide to writing clearer prompts builds on.
To set the answer style, select “Configure Chat”, pick “Default”, “Learning Guide” or “Custom”, choose a response length and select “Save”. Learning Guide is built for educational content; Custom takes a style or role you describe.
No answer usually means the information is not in your sources, or a source tripped a safety flag.
Warning
“Delete Chat History” in the chat panel’s three dots menu clears your whole chat history, so every answer you have not saved is lost. Back up first: select “Save to note” under each answer you want to keep (Step 6), and for an extra copy outside the notebook, hover over the note in the “Sources” panel and select More, then “Export to Docs”.
Expected result: an answer with in-line citations that open the quoted passage.
Step 6: Save a Useful Answer as a Note
Select “Save to note” under an answer worth keeping; the note keeps its tables and clickable citations. To write your own, select “Create note” in the “Sources” panel.
Notes sit in the Sources panel beside your files, so chat can cite them and Studio can use them. They also matter for sharing: your chat history in Gemini Notebook stays private to you, while a viewer can read the notes you share. Chats you have with the notebook in the Gemini app are different (Step 8).
Expected result: the note listed in the “Sources” panel.
Step 7: Make Your First Studio Output
Select one output in the “Studio” panel: “Audio Overview” for listening, “Flashcards” or “Quizzes” for study, Reports for a document, or the Mind Map chip in chat for an overview.
Each generation uses your AI limits, and a bar at the bottom of Studio generation shows the expected usage cost. Outputs created automatically when you first add sources are generated once and do not count toward limits.
You need edit access to generate an Audio Overview, flashcards, quizzes or an infographic. Video Overviews, Slide Decks (18+), Infographics (18+) and Data Tables live in the same panel.
Warning
Regenerating a mind map means More, then “Delete note”, which deletes the current map. To keep a copy, select “Download” in the Mind Map window first.
Expected result: your output in the “Studio” panel, with a small blue dot until you open it.
Audio Overview
Select “Audio Overview” and pick a format: “Deep Dive” (default, two hosts), “The Brief” (one speaker, under two minutes), “The Critique” or “The Debate”. Choose a language, a length and an optional focus prompt. For a refresher before a meeting, The Brief is the format built for it; “Download” saves the audio.
Mind map
Select the Mind Map chip in chat, and the map appears as a note in the “Studio” panel; select a node to ask about that topic. Mind maps don’t work in the phone app. Regenerating one starts with deleting the current map (see the warning above).
Slide deck
Select “Slide Deck” in the “Studio” panel, pick a format, output language, length and sources, describe the deck you want, then select “Generate now” or “Generate later”. The three dots menu next to the finished deck downloads it as a PDF file.
Video Overview
Select “Video Overview” in the “Studio” panel, customize it, then select “Generate now” or “Generate later”, and come back to the notebook while it renders.
Flashcards and quizzes
Select “Flashcards” or “Quizzes”, or the pencil icon to set the difficulty and a prompt. Mark cards “Got it!” or “Missed it!”, then retake “Only cards you missed” to drill weak spots. Flashcards download as a CSV file.
Generate a report
Select Reports, then “Document” for a template such as a study guide or briefing document, or “Interactive” for a “Learning Overview”. Select “Generate now” or “Generate later”; the three dots menu then holds “Export to Docs”. Interactive reports are web-only.
See the prompt behind an output
Select “View custom prompt” in the three dots menu next to an artifact in the Studio panel; flashcards, quizzes and videos also show “Show prompt” in the viewer. Reading it tells you why an output missed, so you can fix that prompt instead of starting over.
Step 8: Share the Notebook
Select “Share,” add an email with “Viewer” or “Editor” access, then copy the link:
- Open the notebook and select “Share”.
- Add an email address and choose “Viewer” or “Editor”.
- Select “Copy link”, or “Copy link to chat view”.
- For a public notebook, set the access to “Anyone with a link”.
A viewer gets read-only access; an editor can add or remove sources and notes and reshare. A personal Gmail account can share one notebook with at most 50 people, and not with Google Groups. I would grant “Viewer” by default, because an editor can remove the sources your outputs rest on.
Warning
Chat View hides sources and artifacts but does not fully revoke a viewer’s access to them. Chats you had with this notebook in the Gemini app appear in the Sources panel as context and are visible to collaborators once you share the notebook. A public link reaches anyone with a Google account, and a public notebook’s artifact links open even for people who are not signed in. To undo, select “Share” and set access back to “Restricted”.
Public sharing is currently disabled for Workspace Enterprise or Education accounts.
Expected result: the lock icon on the share menu turns into the shared icon or, for a public notebook, a globe icon.
Step 9: Make a Private Copy of a Notebook
Open a notebook you own, or a shared or public one that allows copies, and select “Copy”, then “Create”: sources and Studio content come along, notes and chat history do not.
Owners turn this on under “Share” by checking “Allow copies” and selecting “Save”. That is the teacher’s tool: each student gets a private copy, and the original stays untouched.
Warning
Notes are not copied. Export each note you need with “Export to Docs” before you rely on the copy, and keep the original until the copy has what you need.
Expected result: a private notebook with the same sources and Studio content, without notes or chat history.
How to Verify Your Notebook Is Working
Tick these off on a small first notebook before you load a full project:
Verification checklist
- Each source appears in the “Sources” panel with its checkbox
- The “Chat” panel shows a summary of your sources
- Selecting a citation in an answer jumps to the quote
- Your saved note is listed in the “Sources” panel
- Your output sits in the “Studio” panel
- The share menu shows the icon you intended: lock, shared or globe
- “Settings”, then “Usage”, at the top right shows your remaining AI usage
What Changing a Source Does to Studio Outputs
Nothing updates in outputs you already made: editing or deleting a source leaves the Studio outputs built from it as they were. An Audio Overview made before an edit keeps describing the old version until you regenerate it.
- Drive sources sync every few minutes, but outputs made from the old text stay unchanged.
- Deleting a notebook removes the notebook and its sources.
Warning
Before you send an output to a class or a client, regenerate it if any of its sources changed since it was made.
Is Gemini Notebook Free? Limits by Plan and Account Type
Yes: you can sign up free of charge with a Gmail account, and that free tier, Gemini Notebook Standard, gives you 100 notebooks and 50 sources per notebook. If cost decides it, my list of the best free AI tools covers other no-cost options.
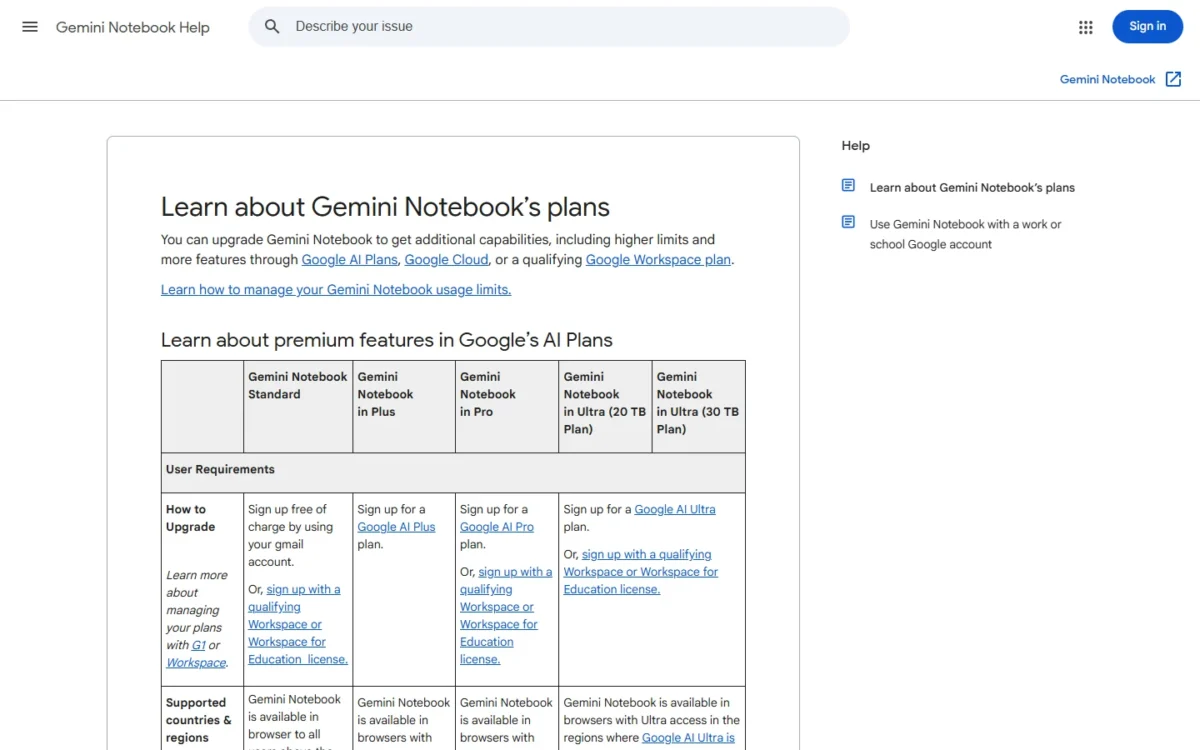
| Plan as Google names it | Notebooks | Sources |
|---|---|---|
| Gemini Notebook Standard | 100/ | 50/notebook |
| Gemini Notebook in Plus | 200/ | 100/ |
| Gemini Notebook in Pro | 500/ | 300/ |
| Gemini Notebook in Ultra (20 TB Plan) | 500/ | 500/ |
| Gemini Notebook in Ultra (30 TB Plan) | 500/ | 600/ |
Sources: Gemini Notebook plans page, checked November 2026.
One notebook per class or project fits Standard; a single notebook that must hold a bigger reading list is what the paid plans are for. Whether that upgrade is worth it, and what it costs, is the job of my Gemini Notebook review.
Usage is a separate, compute-based meter. When you hit it, the quota refreshes every 5 hours until you reach your weekly limit.
| Plan | Usage limit |
|---|---|
| Without a plan | Standard limits |
| AI Plus | Two times higher than standard limits |
| AI Pro | Four times higher than standard limits |
| AI Ultra | 5x or 20x higher than AI Pro depending on your subscription |
Sources: Gemini Notebook usage limits page, checked November 2026.
When you run out, “Generate later” (web only) delays a Studio output, which may then take a couple of hours.
Advanced sharing is for paid users, while custom chat and analytics are available to everyone. Co-creating Video Overviews and Slide Decks, where you review producer notes or an outline before the final render, is only available to Google AI Ultra subscribers. Sharing a notebook does not change the source limit for any collaborator. If those limits keep getting in your way, see my NotebookLM pricing guide before you choose a paid plan.
Using Gemini Notebook on Your Phone
The phone app handles chat, Audio Overviews with offline playback, flashcards, quizzes, infographics, slide decks and Video Overviews, but it can’t generate notes, mind maps, reports or data tables yet.
On Android 10 and up, search the Play Store for “Gemini Notebook” and tap “Install”. In the app, select “Create New”; while viewing a website, PDF or YouTube video, tap the share icon and select Gemini Notebook to add it as a source.
| Feature | Web | Phone app |
|---|---|---|
| Source types | Files, links, Drive, copied text | PDF, Website, YouTube, Audio, Copied Text |
| Chat configuration and analytics | Yes | Not supported |
| Notes | Create and edit | View and use in chat; no editing |
| Mind maps, reports, data tables | Yes | Not yet available |
| Live voice conversation | Not available | Yes, ages 18+ |
Sources: mobile app help page and chat help page, checked November 2026.
For a phone-first student, that means flashcards and audio on the go, with notes, mind maps and reports built at a computer.
Using It With a Work or School Account
Most work and school Google Accounts have access, and for Workspace and Workspace for Education users Gemini Notebook is a core service, like Gmail and Docs. If you can’t get in, your Workspace admin has to turn it on, and on Enterprise or Education accounts you lose public links. Limits follow your organization’s access level:
| Access level | Notebooks | Sources | Chats | Audio Overviews |
|---|---|---|---|---|
| Standard Access | 100/ | 50/notebook | 50/day | 3/day |
| More Access | 200/ | 100/ | 200/ | 6/day |
| Higher Level Access | 500/ | 300/ | 500/ | 20/day |
| Expanded Level Access | 500/ | 400/ | 1k/day | 40/day |
| Highest Level Access | 500/ | 600/ | 5K/day | 200/ |
Sources: Gemini Notebook work and school account page, checked November 2026.
The Audio Overview column is the one to watch: at 3/day on Standard Access, a teacher who wants one recap per class runs out at the fourth class that day. A Pro, Plus, Expanded or Ultra badge next to your profile image means higher limits.
Uploads, queries and responses from Workspace users aren’t seen by human reviewers or used for AI training.
Using It for Study, Work and Teaching
Students lean on Learning Guide and flashcards, teams on Drive sync and briefing reports, and teachers on Viewer sharing and copies.
For studying
Add course materials, set “Configure Chat” to “Learning Guide”, then generate flashcards and retake “Only cards you missed” until the deck is clean.
For work
Import team documents from Google Drive so they stay synced, ask cited questions, and export a briefing document report with “Export to Docs”. Google’s announcement mentions business owners creating interactive onboarding materials.
For teaching
Share a class notebook as “Viewer” and check “Allow copies” so each student works in a private copy. Copies leave notes behind, so put anything students need into a source rather than a note, and on a personal Gmail account one notebook can be shared with at most 50 people.
Practical Example: A Product-Training Notebook
Here is an illustrative case with invented inputs: a team lead builds a training notebook for new support hires from a handbook PDF, a captioned public YouTube webinar and a Drive FAQ doc.
| Step | Illustrative input | Output to expect | Label used |
|---|---|---|---|
| Add sources | Handbook PDF, webinar link, FAQ doc | Sources listed, a summary in Chat | “Upload a source” |
| Check an answer | A refund question naming the handbook | An answer citing the handbook | “Chat” panel |
| Keep it | The cited answer | A note in Sources | “Save to note” |
| Make a briefing | All three sources checked | A briefing document in Studio | “Document” |
| Share read-only | The new hires’ emails | Hires read without editing | “Viewer” |
Sources: illustrative example team; labels from Google’s notebook creation and sharing page, checked November 2026.
The FAQ doc is the part to watch: when someone edits it, the source syncs but the briefing does not, so the team lead regenerates it before the next hiring round.
How to Use Gemini Notebook Effectively
Four habits do most of the work:
- Ask specific questions that name the source, instead of “Summarize this source.”
- Check only the sources the question needs.
- Set the chat style in “Configure Chat” before a long session.
- Set the output language under “Settings”, then “Output Language”; it defaults to your Google Account’s preferred language.
Common Mistakes
Most beginner problems come from expecting the notebook to know or keep more than it does:
- Asking about something no source covers: add the source first.
- Expecting outputs to update after a source edit: regenerate them.
- Assuming a copy keeps notes: export notes first.
- Granting “Editor” when “Viewer” was meant: editors can remove sources.
Troubleshooting
The problems below come from account access, the source file or a usage limit:
| Problem | Possible cause | What to check |
|---|---|---|
| Can’t access Gemini Notebook | Age check missing, unsupported country, or admin hasn’t enabled it | Your Google Account age setting; your Workspace admin |
| Question not answered | Safety flag, unclear phrasing, or not in sources | Rephrase precisely; add the source |
| No citations | Source content too short | Expect a whole-document reference |
| Source import failed | Over 500,000 words, over 200MB, or a copy-protected PDF | Split the file or use an unprotected copy |
| YouTube import failed | Invalid link, no captions file, unsupported language | A public video with captions |
| “Limit reached” in chat | Usage limit hit | The refresh time shown in chat |
Sources: Gemini Notebook FAQ page and sources help page, checked November 2026.
How I Verified the Steps
I built these steps from Google’s Gemini Notebook help center pages on sources, chat, notes, Studio outputs, sharing, plans, usage, work accounts and the mobile app, plus Google’s rename announcement, read on November 1, 2026. Every panel, button and setting in quotes is written as those pages print it; your screen may differ by account type, age and device.
FAQ
Do my notebooks show up in the Gemini app?
Yes. Notebooks you create appear in Gemini, and changes such as new sources sync between the apps, but Studio artifacts are made only in Gemini Notebook and shared notebooks don’t show in Gemini.
Is my data used to train Gemini Notebook?
Not unless you give feedback, which can let Google review that interaction.
Can I recover a deleted note?
No, there’s currently no way to recover deleted notes, so export important ones with “Export to Docs”.
Next Steps
Run the verification checklist on your first notebook, then decide whether 50 sources per notebook fits your project or needs splitting. For creative tasks Gemini Notebook won’t do from your sources, a general chatbot from my ChatGPT alternatives list is the better tool.