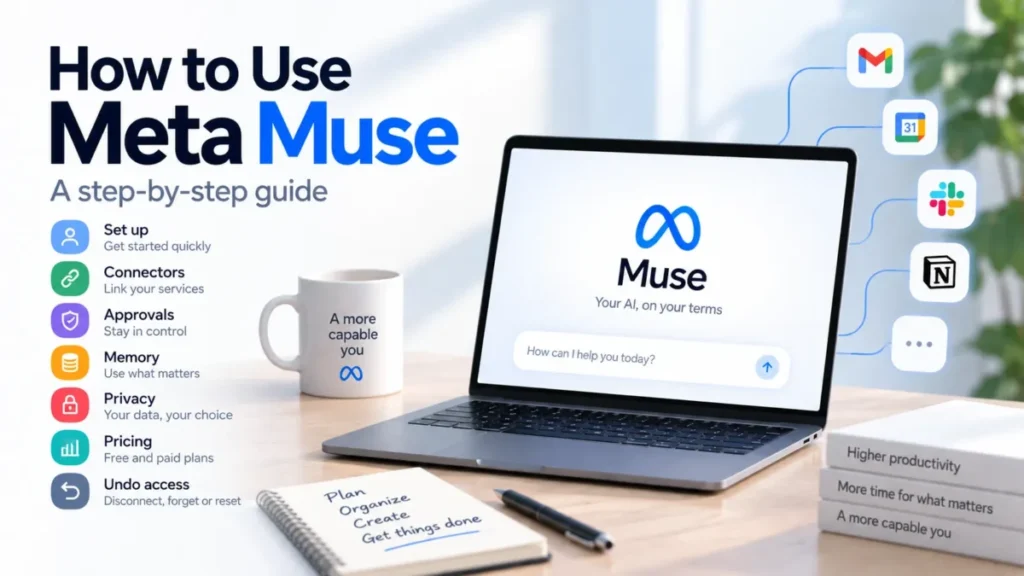

Meta Muse does not wait for a question. You share a goal, it helps you develop a plan, it works on its own secure computer, and on longer tasks it comes back when something changes or it needs approval.
In This Article (18 sections)
That changes what setup means. Signing in is the quick part, and the decisions that follow it decide how much of your life the agent can reach.
This guide walks the whole sequence in order: what Muse actually is, what you need before you start, the seven setup steps, the exact approval and memory controls, and the six ways to undo everything you granted.
What Meta Muse Is, and What It Is Not
Meta describes Muse as a secure, private personal AI agent that proactively helps with people’s goals and suggests ideas. The sentence that matters more comes next in the same announcement: it does not just answer questions, it does the work.
The practical difference shows up in what you type. A chatbot answers “what should I cook for eight people on Saturday” with a menu.
Muse is built for the version where you hand over the whole errand. It turns a recipe reel you saved on Instagram into a grocery list, suggests a menu for the dinner party, and remembers your friends’ dietary restrictions before it sends the invites.
Meta states that Muse can handle tasks like sending an email or booking travel, and that it can take on big audacious goals. It can open a browser, fill out forms, and negotiate on your behalf.
One naming point is worth settling first, because search results for the name mix three different things.
| Name | What it refers to | Where you meet it |
|---|---|---|
| Muse | The personal AI agent app itself | The iOS and Android apps, plus muse.ai in a browser |
| Muse Spark | Meta’s most capable model to date, built for real-world agentic work, which powers Muse | Behind the app, named in the announcement rather than installed |
| Muse Secure VM | The dedicated secure computer that Muse runs on, with its own browser | Behind the app, where your connected credentials are stored |
Source: Meta’s Muse announcement, published 2026-09-08. The model name and the virtual machine name both come from that page.
Read that table before you read any comparison of Muse against a chatbot. Two of the three names are things you never install, a model and a virtual machine, and only Muse itself is a thing you sign in to.
The design goal Meta states for the app is worth knowing because it sets your expectations for the first session. Muse was built to work for billions of people worldwide, so there is no learning curve and no technical experience required.
That claim is testable in your first ten minutes. If you find yourself hunting for a settings switch to make a basic request work, the product is missing its own target.
What You Need Before You Start
Six conditions sit between you and a working Muse, and most of them are settled before you open it. Treat the table below as a prerequisite checklist, because an unmet prerequisite is what stops the first step.
| Requirement | What Meta publishes | What it means for you |
|---|---|---|
| Location | Rolling out in the US on iOS, Android and muse.ai | Outside the US there is nothing to set up yet |
| Subscription availability | Muse and Muse subscriptions are in limited testing and are not available in all locations yet | A paid upgrade can be unavailable even where the free app works |
| Account | You log into Muse using your Meta account, which you can create with a Facebook or Instagram account, an email address or a phone number | An existing Facebook or Instagram login is the fastest route in |
| Age | You must be 18 or the age of majority in your country to subscribe | The age gate is written against subscribing, so treat 18 as the floor for paid use |
| Cost to start | Muse is available free with a usage limit | You can finish every step in this guide before paying anything |
| Terms | You agree to the Meta Subscription Terms of Service, and follow the Muse Supplemental Terms of Service and Meta Community Standards | One document you accept and two more you are held to |
Source: Meta’s Muse subscriptions help page for the subscription availability, account, age, cost and terms rows, and the announcement above for the location row. Both checked 2026-09-13.
Your goal in this section is a narrow expected result: you know whether your account clears the required plan and permission gates before you install anything. If a row does not apply to you, that row is the step to settle first.
One more line from the same page shapes how you read everything that follows. Subscription benefits and availability may vary by region and account, and the available benefits are shown to you during onboarding before you subscribe.
So the onboarding screen is the authority for your account, not this page and not any review. Read it rather than skipping it, because it is where regional differences surface.
There is also a hardware note worth planning around. Meta says Muse is coming soon to AI glasses, which is a different input surface from a phone.
I would not buy glasses for this yet. None of the Meta pages cited here puts a date on that, and the phone app is where the controls in this guide live.
Step 1: Get Muse and Sign In
Get the mobile app on iOS or Android, or open muse.ai in a browser if you would rather start on a desktop. Meta names both as the places to use Muse and to subscribe.
Sign in with your Meta account, using the creation options listed in the requirements table above if you do not have one yet.
Expected outcome: you reach the app Meta’s help pages describe, which they move around by Chats, Goals and Library tabs plus an Assistant icon, with a main chat thread inside the first of those tabs.
Pitfall: three connections may already exist before you connect anything. Facebook, Instagram and Threads are connected automatically if you have those accounts in the same Accounts Center, and you do not need to do anything to set them up.
That automatic step is the most surprising thing in Meta’s Connectors documentation. It is also the first thing worth checking, which is why the Connectors screen appears in Step 3 rather than at the end.
Do not give the agent a real task yet. The next five minutes decide what it can see, and a goal issued before that is a goal issued blind.
Step 2: Learn Where Your Data Lives
Muse spreads your information across named locations, and most of them carry their own path. Learning them now saves you from asking the agent to find something it filed somewhere else.
| Location | What it holds | How you open it |
|---|---|---|
| Chats tab | Your messages and instructions, Muse’s responses, and information from services used to perform tasks | Open the Chats tab, where the main thread and any side chats live |
| Goals tab | Personal goals you set, which Muse helps you track progress on, and sends check-ins about | Open the Goals tab |
| Library tab | Artifacts that Muse creates, meaning documents, images, videos, podcasts and other files | Open the Library tab |
| System Files | All files uploaded or created by you | Open the Library tab, then select System Files |
| Information from Connectors | Information Muse retrieves or receives from connected services, such as emails and calendar events | No separate screen: ask Muse in your chat what it holds from a Connector |
| Reminders and scheduled tasks | Reminder times and content, stored so they can be delivered on schedule | Tap the Assistant icon, then tap Upcoming |
| Identity screen | The route to your Muse’s Memory and Soul files, and to its own name, creature, vibe or tag line | Tap the Assistant icon, then Identity |
Source: the Muse data page. Each row draws on a category described on that page together with the path it gives.
Expected outcome: you can open each of those without searching, and you know which tab a finished document lands in.
The Library is the one to look at first. Artifacts are what the agent produces, so that tab is where you will judge whether a long-running task actually finished.
Side chats are worth using from day one. You can create side chats to organise your chats, and they can be deleted individually from the three dot menu inside the Chats tab.
That matters because deletion is coarse everywhere else. A task kept in its own side chat can be removed later without touching the main thread.
Step 3: Connect Your First Connector
Connectors are how Muse gains abilities. Meta’s own framing is direct: when you set up a Connector, Muse gets new abilities, like the ability to see your calendar or write an email.
There are two routes, and the conversational one is a single message. Meta’s Connectors help page gives both.
The short route is to ask Muse directly, for example by typing “Connect my Gmail”. The documented route is four steps.
- Go to Settings, then tap Connectors.
- Tap Connect next to the Connector you want and read the information.
- Tap Continue to authorize the connection.
- Follow any additional login or authorization steps.
Expected outcome: the Connector is live, and Meta’s wording for that state is that while connected, Muse exchanges information with the Connector relevant to the tasks you give it.
Pitfall: the second item says read the information, and it is the only item with no button to press. Meta tells you to read that screen before you tap Continue.
Meta states the data principle plainly. Muse is designed to exchange with Connectors only the data needed for them to work for you, so connecting your email lets Muse search your email but does not download your whole inbox unless you tell it to.
The words “unless you tell it to” are the ones to remember. The restraint is a default, not a wall, and your own instruction can lift it.
Some Connectors also push information to Muse rather than waiting to be asked. Calendar Connectors can update Muse automatically when your schedule changes, and Meta says it identifies the Connectors that do this before you connect them.
Start with a calendar rather than email. A proactive calendar Connector shows you what unprompted behaviour feels like, on data where a mistake costs nothing.
Some Connectors are managed outside the app’s own settings. After setup, access for Connectors like Apple Health or Android SMS is managed in your device settings, which means the phone’s permission screen is the real control for those.
If you connect Google services, one extra policy applies. Meta states that information received from Workspace APIs is used in line with the Google User Data Policy, including the Limited Use requirements.
Every Connector also brings its own paperwork. Connectors have their own terms and privacy policies governing how they use the information they receive, so the agreement you accepted with Meta is not the only one in play.
Step 4: Decide When Muse Asks for Approval
This is the setting that decides how much autonomy you have handed over, and it deserves more attention than the install.
The default is conservative. By default, Muse will not take many important actions, such as sending an email, without your approval.
Meta describes a second, stricter control at the Connector level. Many Connectors can be set up so that Muse is only able to retrieve data but not take actions, such as sending a calendar invite.
You change when Muse asks for approval in your Settings, and Meta does not publish the exact screen beyond that. So the choice exists at two levels: what the agent may do at all, and when it pauses to check.
a task
retrieve only, or
retrieve and act
never available
wants to take
prompt
| Control | Where it lives | When I would use it |
|---|---|---|
| Approval prompts | Settings, and Meta publishes no deeper path than that | Leave the default in place for the first month on anything that sends or spends |
| Retrieve-only Connectors | The setup for Connectors that support it | Use it for work accounts and any calendar shared with other people |
| Sensitive-action check | Built in, since Muse checks with you before sensitive actions like sending an email or making a purchase | Treat it as a floor, not as your whole policy |
| Audit trail | Muse shows a complete audit trail of everything it has done and plans to do | Read it weekly in month one, then monthly |
Source: approval rows from the Connectors help page; the sensitive-action check and the audit trail from the Muse announcement.
Expected outcome: you can name, out loud, which actions your Muse can complete without pausing.
If you cannot answer that, the setup is not finished no matter how many Connectors are green.
The audit trail is the control worth building a habit around. It covers what the agent plans to do as well as what it has done, which makes it a preview rather than a postmortem.
Read it before the first long task rather than after. Catching a bad plan costs a tap, and catching a bad send costs an apology.
Step 5: Give It a Goal, Not a Question
Muse is built around a shape of request a chat box never rewarded. Meta’s description is that once you share a goal, Muse helps you develop a personalised plan and coordinate your time and resources, then advances the work on its own.
For tasks that take more time, Muse keeps working after you close the app and comes back when something changes or when it needs approval.
So the prompt that gets the most out of it names an outcome and a deadline, not a single step. The ten below are written in that shape, and most of them name the point where you want the agent to stop.
Start with a scoped errand rather than something with money in it.
Plan a dinner party for six people on the last Saturday of this month. Check my calendar for conflicts, propose a menu, and ask me before you send any invites.
Take the recipes I saved on Instagram this month, turn them into one grocery list grouped by supermarket aisle, and save it to my Library.
My goal is to run a 10K in twelve weeks. Build the plan, add the sessions to my calendar, and check in with me every Sunday evening.
Go through this week’s unread email, tell me which five items actually need a reply from me, and draft each reply for my approval.
Find three quotes for repainting a room measuring four metres by five metres in my area. Show me the comparison before you contact anyone.
Book a return flight for the dates in my calendar entry called Client Visit. Stop and show me the options before you pay for anything.
Track the price of the item in this link every day for two weeks. Tell me only if it drops below the number I give you.
Build a reading plan for the four books in my Library, one chapter a day, and remind me at 8pm on weekdays only.
Every Friday at 5pm, write me a summary of what you did this week and what you plan to do next week, then wait for my corrections.
Take the notes in my last three side chats about the kitchen renovation, merge them into one document in my Library, and flag every decision I have not made yet.
Expected outcome: the agent returns a plan rather than an answer, and it pauses at the point you named.
Pitfall: the last prompt depends on side chats a new account does not have yet. Give the agent a week of material before you ask it to merge your own history.
Prompt seven is worth reading twice. A standing instruction with a threshold is the kind of task an agent that keeps working after you close the app can do and a chat assistant cannot.
If you want a broader grounding in how to shape requests like these, my guide to prompt engineering covers the general principles that apply across tools.
Step 6: Check What It Remembers
Muse remembers what matters to you so it can make suggestions unprompted and act on details you mentioned only once. That is the feature, and it is also the thing to audit.
Three files hold the personal layer, and Meta lets you edit all three directly.
| File | What it holds | How you reach it |
|---|---|---|
| Memory.md | Information you share, which may be saved in Memories so Muse can personalise responses | Tap the Assistant icon, then Identity, then Memory |
| Soul.md | Who your Muse is, including core truths, boundaries and personality | Tap the Assistant icon, then Identity, then Soul |
| Identity.md | Information about your Muse, such as its name, creature, vibe or tag line | Tap the Assistant icon, then Identity |
Source for all three files: the Muse data page, which states you can edit and delete information in each file directly.
Expected outcome: you have opened Memory and read every line in it, and you have deleted anything you do not want acted on unprompted.
The simplest audit route is conversational. Meta says the simplest way to manage your information is to ask your Muse: you can ask what it has saved about you, ask for access to a file, or ask it to delete information.
Do that at the end of week one. If the file is still empty after a week of connected access, the Connectors you granted are narrower than you thought.
The Soul file is the unusual one, and I would leave it alone at first. Boundaries written there are instructions about behaviour rather than facts about you, so edits there change how the agent acts rather than what it knows.
Step 7: Understand the Payment Path Before You Need It
Muse can buy things, and the payment path is worth understanding before an agent is midway through a purchase. Every detail below comes from the Muse launch post.
Muse can check out with Link, built by Stripe. Meta states it is the first AI agent covered by Link’s purchase protections, listing free coverage for damaged or lost items, price drops, no-fee returns and a return guarantee on eligible purchases.
The detail that matters for security is the card. Link’s wallet for agents generates a one-time-use card, so your real card details stay hidden.
Two more options are named as coming rather than shipped. Shop Pay is coming soon as another way to pay, along with 1Password support so Muse can use logins you already have.
Expected outcome: you know which payment route your Muse would take, and you have read the sentence about one-time-use cards before an agent is holding your money.
Pitfall: do not read the purchase protections as unlimited. Meta writes the return guarantee against eligible purchases, and it does not say what makes a purchase eligible.
The sensitive-action check from Step 4 is what stands between a plan and a payment. That is the reason I would not weaken approval prompts on any account that can spend.
What the Architecture Stops Muse Doing
Meta built a specific architecture for this product, and several parts of it change what you need to worry about. The Muse security section is the source for all of them.
Muse runs on its own dedicated computer in the cloud, contained so no one else’s agent can reach it. That machine is where Muse lives, and where the data and credentials for any service you connect are stored.
A separate Sentinel agent runs on that same machine, kept apart from Muse at the system level. Nothing Muse does reaches the internet unless the Sentinel approves it, and Meta’s sentence continues that it asks you for permission when needed.
storage
That second agent is the structural claim worth weighing. The check on the agent’s outbound behaviour is another process rather than the agent’s own judgement, which is a different design from a model told to behave.
Credentials sit outside the agent’s view entirely. Meta states that Muse has no visibility into your passwords or payment methods, that any credentials you share go into secure storage so Muse can use them without seeing them, and that this includes passwords you type into the browser yourself.
Two more commitments are written against your data rather than your credentials. Muse does not share your conversations or the data in your VM with Meta’s ad systems, and you can opt out of your interactions being used to train Meta’s AI models.
One thing is announced rather than available. Meta says it will introduce Muse Confidential VM later this year, where the whole VM including your data and conversations is encrypted with a key only you hold, so not even Meta can access it.
Treat that as a roadmap item when you decide what to connect. The protection you get now is the contained VM and the Sentinel, and the encryption-only-you-can-open version has not shipped.
Custom Connectors Deserve a Slower Yes
If a service you want is not in the Connector list, the Custom Connector documentation says you can ask Muse to create a Custom Connector. Muse guides you through the process, which can involve retrieving API information from the service.
That API information goes into Muse’s Secure Credentials Store. The warning attached to it is Meta’s own, not mine.
Meta does not review custom connectors or how they use your information, so the page tells you to grant access with caution and review the provider’s privacy policies. Meta makes no equivalent statement either way about the listed Connectors.
That warning sits in one sentence that is easy to scroll past. It is the sentence that changes how carefully you should read the next screen.
My rule for this is simple. A Custom Connector is worth building for a service you already trust with an API key, and not worth building to save yourself a manual export.
Meta has told you plainly that it is not checking this one. You are the only reviewer of what that integration does with your data.
How to Undo Everything
Six separate undo paths exist, and they remove different things. Knowing which one you need is the difference between losing a Connector and losing a year of context.
| Action | What it removes | Where |
|---|---|---|
| Disconnect a Connector | Stops Muse exchanging data with that service, though information already used may remain in memories and chat history | Settings, under Connectors |
| Forget skill | Information about a specific person, topic or matter, removed from memories and supporting files to the best of the agent’s ability | Ask Muse directly to forget a topic or set of interactions |
| Delete a side chat or a goal | One side chat thread, or one goal | Select it in the Chats or Goals tab, tap the three dot menu, select Delete, then confirm |
| Delete a file or a message | A file in the Library, a message you sent, or files in your virtual machine | In the Library tab, tap the individual file and delete it; Meta publishes no separate path for messages or VM files |
| Reset Muse | All Muse data, including chat history, files and active tasks, returning Muse to its original state | Settings, then Data Controls, then Reset Muse |
| Delete your Meta account | All information associated with your account, including Muse | Accounts Center |
Source: the Muse deletion documentation for every row except the disconnect row, which comes from the Connectors page linked in Step 3.
Two warnings attach to that table without appearing in it, and both are Meta’s wording rather than mine. Resetting Muse cannot be undone, and after you delete something, Muse may still remember information it learned from what you deleted.
Read those two together, because they explain why the forget skill exists. Deletion removes the record, and forgetting is what targets the learning that came from it.
The reset flow is short and worth reading before you start it. Open Settings, select Data Controls, tap Reset Muse, follow the instructions on screen, then tap Reset to confirm.
Export before you do any of that. You can download a copy of your chats, files and other agent information from Settings, then Data controls, then Download your Muse data, then Download to confirm.
The training setting belongs in this section too, because it is on when you first use Muse. To turn it off, open Settings, tap Data controls, toggle off the setting for helping improve Meta’s AI models, then select Turn off to confirm.
That change is retroactive. Meta states that changes to this setting also apply to previous interactions, and that when the setting is off your interactions will not be used to develop and improve AI at Meta.
If you leave it on, Meta says it still removes certain categories of personally identifiable information such as names, email addresses, phone numbers and Social Security Numbers, and disassociates the interactions from your account. That is a mitigation rather than an exemption, and the toggle is the exemption.
What It Costs and What a Token Allowance Means
Muse is free with a usage limit. If you reach that limit and want more, you can upgrade to a paid subscription or wait until your free usage limit refreshes.
| Plan | Price | Published allowance |
|---|---|---|
| Free | No charge | Available for free with a usage limit, with no figure published for the free tier |
| Power | $20 per month | 500M Muse tokens per week |
| Maximum | $100 per month | 3B Muse tokens per week |
Source: the Muse subscriptions help page. Meta states that the weekly usage allowance increases as you upgrade plans.
Subscribe with your Meta account through the mobile app or at muse.ai. The subscription renews automatically each month unless you cancel, and you are charged on the same date each month as your original purchase date.
You can view subscription details, update your payment method, or cancel at any time.
The token unit is the part worth thinking about before you upgrade. Meta publishes the allowance per week rather than per month, so a heavy week is the thing that hits the ceiling, not a heavy month.
That weekly reset is good news for the way agents actually get used. A single research-heavy project spread over four days is the usage pattern most likely to exhaust a plan, and the clock resets sooner than a monthly bill implies.
Meta does not publish a conversion between tokens and tasks, so nobody can honestly tell you how many dinner parties 500M tokens buys. Run the free tier until you hit its limit, then let your own usage decide the plan rather than an estimate.
The five-times price gap between the two paid plans buys six times the weekly allowance. If your use is occasional, that maths argues for staying on Power and accepting the occasional wait.
For a sense of where agent pricing sits against ordinary assistant subscriptions, the ChatGPT pricing breakdown covers those tiers.
Common Mistakes and How to Fix Them
Six failure patterns come out of the published material rather than from guesswork. Five carry a fix Meta documents, and the last pairs Meta’s warning with a rule of my own.
| Mistake | What happens | Fix |
|---|---|---|
| Assuming nothing is connected yet | Three Meta services can already be connected, as Step 1 explains | Open Settings, then Connectors, and review the list before your first task |
| Skipping the information screen when connecting | Meta tells you to read the information on that screen before you tap Continue | Read that screen, then authorize |
| Expecting a disconnect to erase the past | Disconnecting stops future exchange, and what the agent already learned is a separate question | Disconnect, then ask Muse to forget the topic as well |
| Treating Reset Muse as a cleanup | Reset is permanent, as the warning under the undo table sets out | Download your Muse data first, then reset |
| Leaving the training setting untouched | The training setting is on when you first use Muse | Turn it off in Data controls if you want it off |
| Trusting a Custom Connector like a listed one | Meta states that it does not review custom connectors or how they use your information | Build them only for services you already trust, and read the provider’s privacy policy |
Source: the Connectors documentation and the Muse data page linked earlier in this guide.
The first row is the one I would check tonight. An automatic connection is not a malicious one, and it is still a connection you did not make deliberately.
Expected Results and What to Do Next
A finished setup leaves you with five things: a signed-in app, a reviewed Connector list, an approval policy you chose, one goal running, and a memory file you have read.
Give the agent a week before you judge it. Muse is described as learning from conversations, reflecting on what matters to you, and getting sharper along the way, which is a claim that only becomes testable with history behind it.
The honest test at day seven is whether anything arrived unprompted that you wanted. Unprompted suggestions are part of what Meta promises, so check the Connector scope before you conclude the product is not for you.
Add one Connector at a time after that, and re-read the audit trail after each addition. Scope creeps by accumulation, and the trail is where each new action shows up.
Set a calendar reminder for the Confidential VM launch, because it changes the privacy calculation for anything you would rather Meta could not read. Connect on the assumption that the current architecture is what you have.
If you are still deciding whether an agent belongs in your workflow at all, my roundup of the best AI chatbots covers the assistants in the same category.
Related Resources
- What is generative AI: the background layer under every product in this category.
- Gemini review: for readers already inside a large consumer account ecosystem.
- Claude review: for readers weighing an agent against a document-heavy assistant.
FAQ
The body covers setup, approvals, memory and cost. These are the questions readers ask afterwards.
How Does Meta Muse Work?
It runs on Muse Secure VM, a dedicated secure computer with its own browser, and it is powered by Muse Spark. You give it a goal, it builds a plan, and it advances the work on its own, coming back when something changes or when it needs your approval.
A separate Sentinel agent on the same machine has to approve anything that reaches the internet.
How Do I Use Muse for the First Time?
Get the app on iOS or Android, or open muse.ai, then sign in with your Meta account. Review the Connector list before you hand over a task, connect one service, then give it a goal with a deadline rather than a single question.
Is Meta Muse Free?
Yes, with a usage limit. Meta describes Muse and Muse subscriptions as being in limited testing and not available in all locations yet, so the free app can be reachable where the paid plans are not.
How Much Does Meta Muse Cost?
Per the Muse subscriptions page, the Power plan is $20 per month with 500M Muse tokens per week, and the Maximum plan is $100 per month with 3B Muse tokens per week. Both renew monthly on your original purchase date unless you cancel.
Where Is Meta Muse Available?
It is rolling out in the US on iOS, Android and muse.ai, with AI glasses named as coming soon. Subscriptions are described as being in limited testing and not available in all locations yet.
Can Muse See My Passwords?
Meta states that it has no visibility into your passwords or payment methods. The architecture section above covers how credentials are held.
How Do I Stop Muse Using My Chats for Training?
Use the Data controls path in the undo section above. The change also applies to previous interactions, so turning it off covers what came before.
How Do I Delete Everything Muse Knows About Me?
Reset Muse from Settings and Data Controls, which is the permanent option in the undo section above. Download your Muse data first, and use the forget skill for anything narrower than a full reset.
Finish Your Setup
Complete setup in one sitting rather than across a week. Sign in, review the Connector list, choose an approval policy you can describe out loud, then give Muse one goal with a deadline.
Come back to the Connector list every few weeks. Access granted for one task stays granted, and that list is the only place the total is visible.
About the author

Macedona is the founder and lead reviewer at SaaS CRM Review, where he has published 175+ in-depth reviews, pricing guides, and comparisons of CRM and SaaS tools. Each review is based on hands-on testing or verified documentation, and every article states clearly which method was used. Pricing and features are checked against official vendor sources, with the verification date noted in the article. Macedona follows a published review methodology and editorial policy. SaaS CRM Review earns affiliate commissions from some links, which never influence ratings or rankings. Read the full affiliate disclosure.