The best Gemini ai photo prompt copy paste combine a clear subject, a specific editing action, style references, lighting direction, and technical constraints like aspect ratio or lens type. This guide gives you 50 copy-paste-ready prompts organized by real editing intent — portraits, product shots, cleanup, and creative looks — plus a reusable framework so you can write your own Google Gemini prompts for any photo.
At a Glance: Best Prompt Categories by Editing Goal
| Editing Goal | Best Prompts | Key Strength |
|---|---|---|
| Portraits & headshots | Prompts 1–10 | Identity preservation, studio lighting simulation |
| Selfies & social media | Prompts 11–20 | Platform-ready crops (4:5, 9:16), natural enhancement |
| Product & ecommerce | Prompts 21–30 | Color accuracy, white-background compliance, texture detail |
| Cleanup & restoration | Prompts 31–40 | Object removal, background replacement, low-light recovery |
| Cinematic & artistic | Prompts 41–50 | Film emulation, color grading, creative double exposures |
If you have tried editing photos with Google Gemini and ended up with waxy skin, melted backgrounds, or a face that looks nothing like the original, the problem is almost certainly your prompt — not the model.
Gemini’s image capabilities — powered by Imagen 3 and the newer Nano Banana 2 and Nano Banana Pro pipelines — are genuinely capable. But unlike a slider in Adobe Lightroom or a filter in Canva, an AI photo editor only understands what you tell it. Vague instructions produce vague results.
This article is a practical resource for US-based creators, marketers, small-business owners, and photographers who want to use Gemini photo editing prompts to get professional-quality results — without spending hours guessing. Each of the 50 prompts below is structured around a repeatable framework, tagged with its best use case, and paired with troubleshooting notes so you know what to fix when something goes wrong.
We also cover how Gemini compares to ChatGPT (DALL-E), Midjourney, Photoshop, and other alternatives — and when you should skip AI editing entirely.
What Are Gemini Photo Editing Prompts?
Gemini photo editing prompts are natural-language instructions that tell Google Gemini how to generate or modify an image. You type what you want in plain English — adjust lighting, remove a background, retouch skin — and the model executes the edit. The quality of your result depends almost entirely on how specific and well-structured your prompt is.
You can use these prompts through Gemini Apps on the web, the Gemini mobile app, or via the Vertex AI API on Google Cloud.
There are two distinct workflows:
- Image generation: You describe an image from scratch and Gemini creates it using Imagen 3 or Nano Banana 2/Pro.
- Image editing (image-to-image): You upload an existing photo and instruct Gemini to modify it — change the background, adjust lighting, retouch skin, remove objects, or apply a color grade.
This article focuses primarily on editing prompts, though many generation prompts here work for both workflows.
Key capabilities as of early 2026:
- Nano Banana 2 introduced stronger instruction following, improved text rendering in images, and local edits (changing part of an image without affecting the rest). These capabilities are documented in Google’s Gemini Help pages.
- Nano Banana Pro is accessed by first generating an image with Nano Banana 2, then tapping the three-dot menu and selecting “Redo with Pro.” This option is available to subscribers on the AI Plus, Pro, or Ultra plans. Nano Banana Pro offers higher-resolution downloads (up to 2K, compared to 1K on the free tier), better character consistency across outputs, and more refined photorealistic quality.
- Google Photos integration via Ask Photos enables some AI-assisted editing within supported Google Photos experiences. Availability may vary by device and region — check Google’s latest Help pages for current status.
Important: Gemini’s image features are subject to Google’s Prohibited Use Policy. The model will decline prompts that request realistic depictions of identifiable public figures, minors in certain contexts, or violent/explicit content.
How to Write a Google Gemini Prompt That Gets Better AI Images
The single biggest reason AI photo edits look fake is vague prompting. “Make my photo look better” leaves the model guessing — and it usually guesses wrong. A well-structured Google Gemini prompt tells the model exactly what to change, how to change it, and what to leave alone. The framework below gives you a repeatable system for every edit.
Use this six-part prompt framework:
The Prompt Formula
Subject + Action + Context + Style + Technical Details + Constraints
This is the single most important takeaway from this guide. Every prompt in this article follows this structure.
| Element | What It Does | Example |
|---|---|---|
| Subject | Who or what is in the image | “a 30-year-old woman,” “a ceramic mug” |
| Action | The edit you want | “remove the background,” “add soft studio lighting” |
| Context | Scene, setting, environment | “in a modern office,” “on a marble countertop” |
| Style | Visual feel or reference | “editorial portrait style,” “warm analog film look” |
| Technical Details | Camera, lens, lighting specifics | “shot on 85mm f/1.4, natural window light” |
| Constraints | What to avoid or preserve | “keep the face exactly the same,” “do not change the clothing” |
How to Preserve Face and Identity
Facial accuracy is one of the biggest friction points in AI photo editing. Identity drift — where the model subtly changes the subject’s face — happens most often when you combine multiple edits in a single prompt. To minimize it:
- Use explicit language: “Preserve the subject’s exact facial features, skin tone, and expression.”
- Avoid stacking too many changes in one prompt. Edit the background first, then refine the face in a follow-up.
- If Gemini changes the face, follow up with: “Revert the face to match the original uploaded photo exactly.”
How to Use Follow-Up Prompts (Prompt Chaining)
Gemini retains context within a conversation. Use this to iterate:
- First prompt: Make the primary edit.
- Second prompt: Refine a specific area (“Now make the background slightly darker and warmer”).
- Third prompt: Add a constraint (“Keep everything the same but sharpen the subject’s eyes”).
This is more effective than trying to pack every instruction into a single mega-prompt. If you are familiar with writing prompts for other tools, the same iterative principle applies — see our guide on ChatGPT prompt engineering techniques for a comparison of how chaining works across platforms.
How to Use Negative Prompts
Negative prompts tell Gemini what to exclude. They are especially useful for photorealistic work:
- “No cartoonish look, no oversaturated colors, no plastic skin texture.”
- “Avoid flat lighting, avoid visible AI artifacts.”
In Gemini Apps, embed negative instructions inline within your main prompt. If you are working through the Vertex AI API, some model configurations support a dedicated negative prompt parameter — consult the relevant model documentation on Google Cloud to confirm availability for your specific workflow, as support may vary by model version and endpoint.
Best Prompt Modifiers by Use Case
This reference table shows the most effective modifiers to append to your base prompt depending on your editing goal. These are the specific words and phrases that consistently produce better results.
| Use Case | Recommended Modifiers | What They Control |
|---|---|---|
| Portraits | “85mm f/1.4,” “Rembrandt lighting,” “catchlight in eyes,” “preserve pores” | Lens simulation, lighting style, skin fidelity |
| Selfies / Social | “4:5 aspect ratio,” “golden-hour color grade,” “natural warmth” | Platform formatting, color temperature |
| Product shots | “#FFFFFF background,” “sharp focus entire product,” “light tent,” “true-to-life colors” | Background compliance, detail, color accuracy |
| Cleanup / Restoration | “blend seamlessly,” “no repeated patterns,” “match lighting direction,” “no flattened depth” | Inpainting quality, lighting consistency |
| Cinematic / Artistic | “Kodak Portra 400,” “teal-and-orange grade,” “lifted blacks,” “anamorphic 2.39:1” | Film emulation, color science, aspect ratio |
| Identity preservation | “preserve exact facial features, skin tone, and expression,” “do not change” | Preventing identity drift |
| Negative constraints | “no plastic skin,” “no cartoonish look,” “no AI artifacts,” “no oversaturation” | Suppressing common AI artifacts |
How We Reviewed the Best Gemini Prompts in 2026
The 50 prompts in this article were selected through an editorial evaluation process, not a controlled benchmark test. Here is how we approached it — and what the limitations are.
Methodology
- Use-case mapping. We identified the most common real-world photo editing needs for US creators, marketers, and small businesses: headshots, product shots, social content, cleanup/restoration, and creative/editorial looks.
- Prompt construction. Each prompt was built using the subject-action-context-style-technical-constraints framework described above, drawing on prompt engineering principles documented in Google Cloud’s prompt design guide.
- Source image types. Prompts were developed against common source material: smartphone selfies, casual phone photos, product shots on cluttered backgrounds, old family photos, and studio portraits in varying lighting conditions.
- Evaluation criteria. Each prompt was evaluated against five dimensions:
| Criterion | What We Looked For |
|---|---|
| Photorealistic quality | Does the result look like a real photograph, not a digital rendering? |
| Instruction following | Did Gemini execute the specific edits requested? |
| Identity preservation | For portraits: does the subject still look like themselves? |
| Practical usefulness | Would you actually use this result for LinkedIn, Amazon, Instagram, etc.? |
| Iterability | Can follow-up prompts successfully refine the initial result? |
- Failure documentation. Each prompt includes common failure points based on known model behaviors — overprompting, identity drift, flat lighting, and loss of fine detail.
Limitations
- We did not run automated scorecards or pixel-level comparisons.
- Results vary by source image quality, resolution, and subject complexity.
- Gemini’s capabilities are updated frequently; some behaviors may change after publication.
- Pricing and feature availability (e.g., AI Plus/Pro/Ultra plans, Nano Banana Pro 2K downloads) are subject to change. Check Google’s Gemini page for the latest.
Gemini ai photo prompt copy paste for Portraits and Headshots (1–10)
Professional portraits and headshots require precise control over lighting, skin texture, and facial identity. These ten prompts cover LinkedIn headshots, corporate team pages, actor comp cards, and natural-light portraits — the most common professional portrait needs for US-based professionals and businesses.
Prompt 1: Clean Corporate Headshot

Best use case: LinkedIn profile, company About page
Copy-paste prompt:
Retouch this portrait to look like a professional corporate headshot. Apply soft, even studio lighting with a subtle catchlight in the eyes. Smooth minor skin blemishes while preserving natural skin texture and pores. Slightly blur the background to simulate an 85mm f/1.8 lens with shallow depth of field. Keep the subject's face, expression, and clothing exactly the same. No oversaturated colors, no plastic skin.
Why it works:
- Visual goal: Clean, professional headshot suitable for business profiles
- Key prompt ingredients: Lens simulation (85mm f/1.8), lighting style (studio with catchlight), skin constraints (preserve texture/pores)
- Expected effect: Shallow depth of field separates subject from background; skin looks retouched but natural
- Common failure: Saying “make it professional” without specifying lighting or skin behavior triggers heavy AI smoothing
- Fix prompt: “The skin is too smooth — restore visible pores and fine lines while keeping the blemish cleanup.”
Best follow-up prompt: “Darken the background to a neutral charcoal gray. Keep everything else identical.”
Prompt 2: Natural Light Executive Portrait

Best use case: Company leadership pages, press kits
Copy-paste prompt:
Edit this photo to look like an executive portrait taken near a large window with soft natural light. The light should come from the left side, creating gentle shadows on the right side of the face. Keep the subject's face and expression unchanged. Apply a warm color temperature (around 5500K). Slight background blur. No harsh shadows, no artificial-looking catchlights.
Why it works:
- Visual goal: Warm, approachable executive portrait with directional natural light
- Key prompt ingredients: Light direction (left side), color temperature (5500K), negative constraints (no harsh shadows)
- Expected effect: Gentle modeling on the face creates depth without the flat, passport-photo look
- Common failure: Omitting light direction produces front-flat lighting
- Fix prompt: “The lighting is too flat — add shadows on the right side of the face from left-side window light.”
Best follow-up prompt: “Increase the background blur slightly and add a very subtle warm vignette around the edges.”
Prompt 3: Actor Headshot with Character

Best use case: Casting submissions, talent agency pages
Copy-paste prompt:
Relight this portrait in the style of a professional actor headshot. Use Rembrandt lighting (key light at 45 degrees, slight triangle shadow on the cheek). Background should be a soft, out-of-focus neutral tone. Preserve the exact facial features, expression, and skin tone. Subtle contrast increase to add depth. No airbrushed skin, no visible AI artifacts.
Why it works:
- Visual goal: Dramatic but professional headshot with named lighting technique
- Key prompt ingredients: Specific lighting pattern (Rembrandt), identity preservation, contrast control
- Expected effect: The triangle shadow on the cheek adds character and dimension; Gemini handles named lighting patterns reliably
- Common failure: Using “dramatic lighting” without naming the pattern produces harsh, unpredictable results
- Fix prompt: “The shadows are too harsh — soften the Rembrandt triangle and brighten the fill side.”
Best follow-up prompt: “Make the triangle shadow slightly softer and brighten the catchlight in the eyes.”
Prompt 4: Gentle Skin Retouch (Preserve Texture)
Best use case: Portrait photography post-processing
Copy-paste prompt:
Retouch the skin in this portrait: reduce visible blemishes, minor redness, and under-eye circles. Preserve all natural skin texture, pores, and fine lines. Do not smooth the skin like a beauty filter. Keep the face shape, bone structure, and expression identical to the original. Maintain the existing lighting and background.
Why it works:
- Visual goal: Subtle retouching that looks like it was done by a human retoucher, not an app filter
- Key prompt ingredients: Explicit texture preservation (pores, fine lines), anchor to original (“identical to the original”)
- Expected effect: Blemishes reduced while skin still looks like real skin
- Common failure: Using the word “flawless” triggers heavy smoothing
- Fix prompt: “The skin lost its texture — restore visible pores and fine wrinkles while keeping the blemish cleanup.”
Best follow-up prompt: “Reduce the under-eye circles a little more, but keep the skin texture exactly as it is now.”
Prompt 5: Studio Headshot on Seamless White Background

Best use case: ID photos, company directory, passport-style (informal)
Copy-paste prompt:
Place this subject on a clean, seamless white background. The lighting should be even and soft, simulating a two-light studio setup with a fill light to minimize shadows under the chin. Keep the subject's face, clothing, hair, and expression exactly the same. The background should be pure white (#FFFFFF) with no gradients, no shadows on the backdrop.
Why it works:
- Visual goal: Clean white backdrop matching professional ID/directory standards
- Key prompt ingredients: Hex color (#FFFFFF), no gradients, specific lighting setup (two-light with fill)
- Expected effect: True white background without the gray gradients Gemini often defaults to
- Common failure: Saying “white background” without specifying seamless or pure white produces off-white or gradient
- Fix prompt: “The background is not pure white — make it #FFFFFF with zero gradients or variations.”
Best follow-up prompt: “There’s a slight shadow on the left edge of the background — remove it while keeping everything else the same.”
Prompt 6: Black-and-White Editorial Portrait

Best use case: Portfolio, magazine-style feature, personal branding
Copy-paste prompt:
Convert this portrait to a high-contrast black-and-white image in the style of editorial magazine photography. Rich blacks, clean highlights, visible skin texture. Slightly increase contrast in the midtones to add depth. Preserve the subject's face and expression. No color tint, no sepia, no heavy grain.
Why it works:
- Visual goal: High-impact B&W conversion with editorial quality
- Key prompt ingredients: Midtone contrast, skin texture visibility, negative constraints (no sepia, no heavy grain)
- Expected effect: Tonal richness and depth instead of a flat grayscale conversion
- Common failure: Saying “black and white” without contrast guidance produces flat, lifeless results
- Fix prompt: “The conversion is too flat — increase midtone contrast and darken the blacks.”
Best follow-up prompt: “Add a very subtle fine film grain, like Ilford HP5 pushed one stop.”
Prompt 7: Environmental Portrait (Office/Workshop)

Best use case: Founder profiles, brand storytelling, “about the maker” pages
Copy-paste prompt:
Edit this photo to look like a professional environmental portrait. Keep the subject sharp and in focus. Slightly blur the background environment to create separation, but keep enough detail that the setting (office/workshop/studio) is clearly recognizable. Apply warm, natural-looking color grading. Preserve the subject's face and clothing exactly.
Why it works:
- Visual goal: Subject stands out from environment while environment tells a story
- Key prompt ingredients: Calibrated blur (“enough detail that the setting is recognizable”), warm color grading
- Expected effect: Background provides context without competing with the subject
- Common failure: Over-blurring the background so the environmental context is lost entirely
- Fix prompt: “The background is too blurry — increase background sharpness so the workspace is recognizable.”
Best follow-up prompt: “Warm up the highlights slightly and cool down the shadows for a split-tone look.”
Prompt 8: Professional Headshot from a Casual Photo

Best use case: Upgrading a smartphone selfie to pass as a professional headshot
Copy-paste prompt:
Transform this casual photo into a professional-looking headshot. Straighten the composition so the subject's face is centered. Apply soft, flattering studio-style lighting. Clean up the background — replace it with a smooth, blurred neutral gradient (dark gray to charcoal). Retouch minor skin blemishes without removing texture. Keep the face, expression, and clothing identical. Crop to a 4:5 portrait ratio.
Why it works:
- Visual goal: Transform an informal photo into something usable for professional profiles
- Key prompt ingredients: Composition correction (centered face), background replacement, crop ratio (4:5), skin constraints
- Expected effect: Multiple improvements in one prompt, structured as a clear checklist for the model
- Common failure: Not specifying the crop ratio, leaving awkward framing
- Fix prompt: “The skin tone looks slightly yellow — correct it to a natural, neutral tone.”
Best follow-up prompt: “The skin tone looks slightly yellow — correct it to a natural, neutral tone.”
Prompt 9: Headshot with Neutral Expression Correction

Best use case: Fixing an awkward smile or squint in an otherwise good photo
Copy-paste prompt:
Adjust the subject's expression in this photo to appear naturally relaxed and confident — a slight, natural closed-mouth smile. Keep all facial features, skin tone, and head position exactly the same. Do not change the hair, clothing, background, or lighting.
Why it works:
- Visual goal: Subtle expression adjustment that looks natural
- Key prompt ingredients: Specific expression direction (“slight, natural closed-mouth smile”), everything-else-unchanged constraint
- Expected effect: Relaxed expression without altering the person’s identity
- Common failure: Asking for a “better expression” without specifying what you want — Gemini may change the entire face
- Fix prompt: “The eyes look different — revert the eyes to match the original photo exactly while keeping the new mouth expression.”
Best follow-up prompt: “The eyes look slightly different — revert the eyes to match the original photo exactly while keeping the new mouth expression.”
Prompt 10: Group Headshot Consistency

Best use case: Team pages where individual shots were taken in different conditions
Copy-paste prompt:
Edit this headshot to match a consistent team portrait style: soft studio lighting from the front-left, neutral medium-gray background, warm but not oversaturated color balance. Crop to 4:5 portrait. Keep the subject's face, expression, and clothing exactly the same. Only adjust lighting, background, and color grading.
Why it works:
- Visual goal: Uniform look across a team page even when source photos vary widely
- Key prompt ingredients: Exact lighting direction, background tone, aspect ratio — makes the prompt reusable as a template
- Expected effect: Consistent visual style across multiple individually processed team headshots
- Common failure: Processing multiple headshots in a single prompt — do them individually with the same template
- Fix prompt: “The background doesn’t match the other team photos — shift it to neutral medium gray.”
Best follow-up prompt: “Shift the background color slightly warmer to match [teammate’s photo].”
Gemini ai photo prompt copy paste for Selfies, Couples, and Social Photos (11–20)
Social and lifestyle photos need a different approach than corporate headshots. The goal is visual appeal and personality, not formal precision. These prompts are optimized for Instagram, TikTok, dating profiles, and travel content — with platform-specific crop ratios and color grades built in.
Prompt 11: Instagram-Ready Selfie Enhancement

Best use case: Dating profile, social media avatar
Copy-paste prompt:
Enhance this selfie for Instagram. Smooth minor skin blemishes while keeping natural texture. Brighten the eyes slightly. Apply a warm, golden-hour color grade. Slightly blur the background. Crop to 4:5 portrait for Instagram optimal display. Preserve the subject's face, expression, and identity. No filter-heavy look, no oversaturated colors.
Why it works: The 4:5 aspect ratio instruction ensures proper Instagram framing. “Golden-hour color grade” gives a specific look instead of generic warmth. The negative prompt prevents the heavy-filter look.
Best follow-up prompt: “Reduce the warmth by about 20% — it’s looking a bit orange.”
Common mistake to avoid: Using “make it Instagram-worthy” — too vague, often produces over-edited results.
Prompt 12: Couple Portrait with Even Lighting
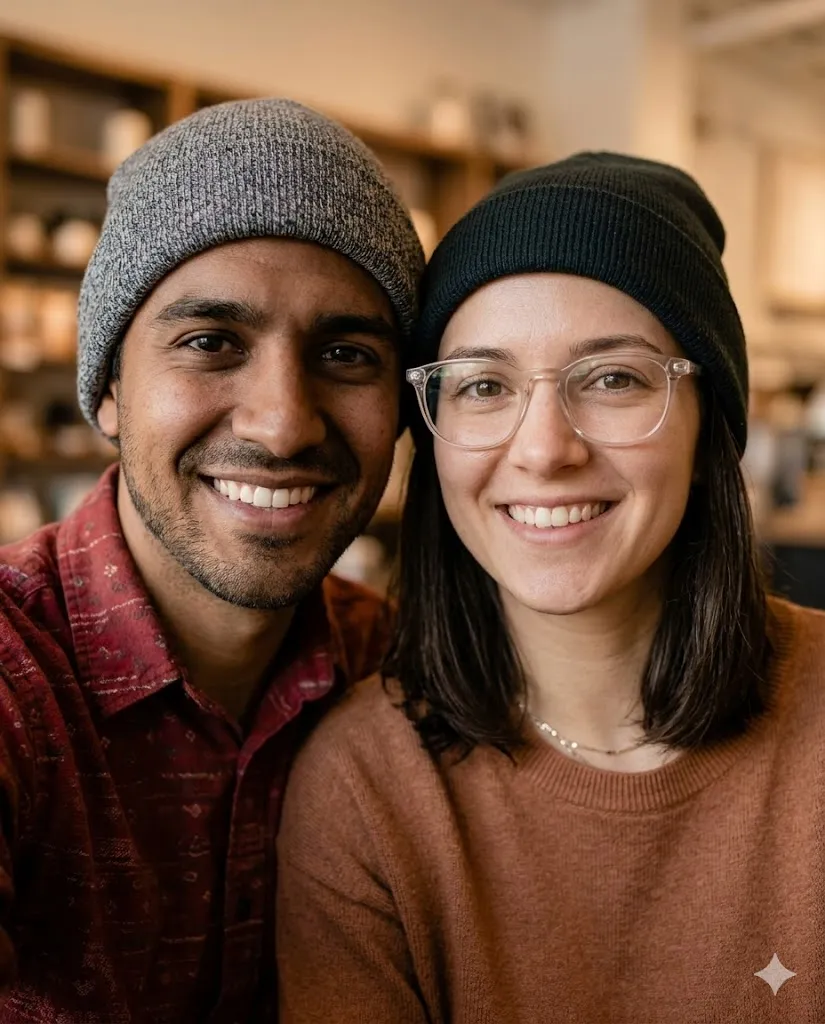
Best use case: Engagement photos, anniversary posts, relationship milestones
Copy-paste prompt:
Edit this couple's photo: equalize the lighting on both faces so neither is in shadow. Apply a warm, romantic color grade with soft highlights. Slightly blur the background to draw attention to both subjects. Keep both subjects' faces, expressions, and clothing exactly the same. No skin smoothing beyond minor blemish removal.
Why it works: “Equalize the lighting on both faces” solves the common problem where one person is in shadow. Specifying both subjects prevents Gemini from only editing one.
Best follow-up prompt: “Brighten the area around the couple slightly to create a natural-looking glow.”
Common mistake to avoid: Not mentioning both subjects — Gemini may focus editing on only one person.
Prompt 13: Travel Photo with Vivid Sky and Clean Composition

Best use case: Travel blog, destination post, vacation memories
Copy-paste prompt:
Enhance this travel photo: make the sky more vivid with deeper blues and defined cloud detail, without looking oversaturated. Slightly boost the colors of the landscape/architecture. Keep the subject(s) exactly as they are — no face changes, no clothing changes. Remove any distracting elements in the foreground (trash, signs, random people) if possible without leaving artifacts.
Why it works: Separating sky enhancement from subject preservation ensures Gemini doesn’t apply the same saturation boost to skin tones.
Best follow-up prompt: “The sky looks oversaturated in the top-left corner — tone it down while keeping the rest of the sky vivid.”
Common mistake to avoid: Saying “make the colors pop” universally — oversaturated skin looks unnatural.
Prompt 14: Profile Photo with Soft Background Bokeh

Best use case: Social media profile, professional networking
Copy-paste prompt:
Create a professional-looking portrait from this photo. Apply a soft background bokeh effect as if shot on an 85mm f/1.4 lens. The bokeh should have smooth, circular highlights. Keep the subject perfectly sharp from the hairline to the shoulders. Preserve all facial features and expression. Apply subtle, flattering warm light to the face.
Why it works: Specifying lens characteristics (85mm f/1.4) produces more realistic bokeh than just saying “blur the background.”
Best follow-up prompt: “The bokeh circles look a bit too uniform — add slight variation in size and brightness.”
Common mistake to avoid: Not specifying what should stay sharp — Gemini may blur part of the subject.
Prompt 15: Lifestyle Photo — Coffee Shop / Café Scene
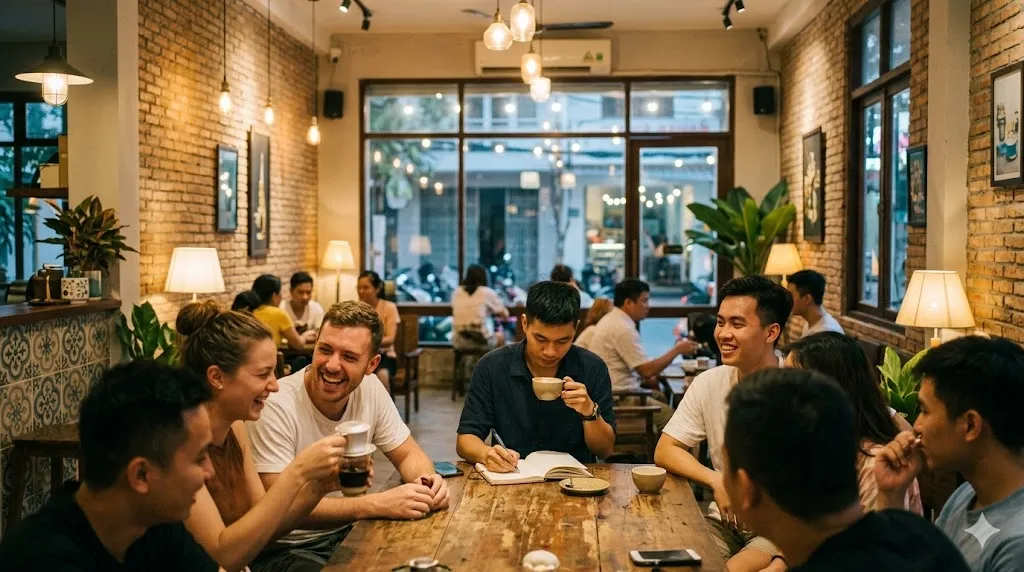
Best use case: Blog feature image, brand lifestyle content
Copy-paste prompt:
Edit this café/coffee shop photo to feel warm and inviting. Enhance the warm tones from the interior lighting. Add a slight glow to any visible light sources (lamps, window light). Keep the subject natural and untouched. Give the image a soft, film-like quality with slightly lifted blacks and gentle highlight roll-off. No heavy filter look.
Why it works: “Lifted blacks” and “highlight roll-off” are specific film-emulation terms that produce a natural analog look without triggering garish “vintage filter” presets.
Best follow-up prompt: “Add very subtle film grain — fine grain, not heavy — to enhance the analog feel.”
Common mistake to avoid: Using “vintage filter” — this often triggers heavy color shifts or sepia tones.
Prompt 16: Group Social Photo with Even Exposure
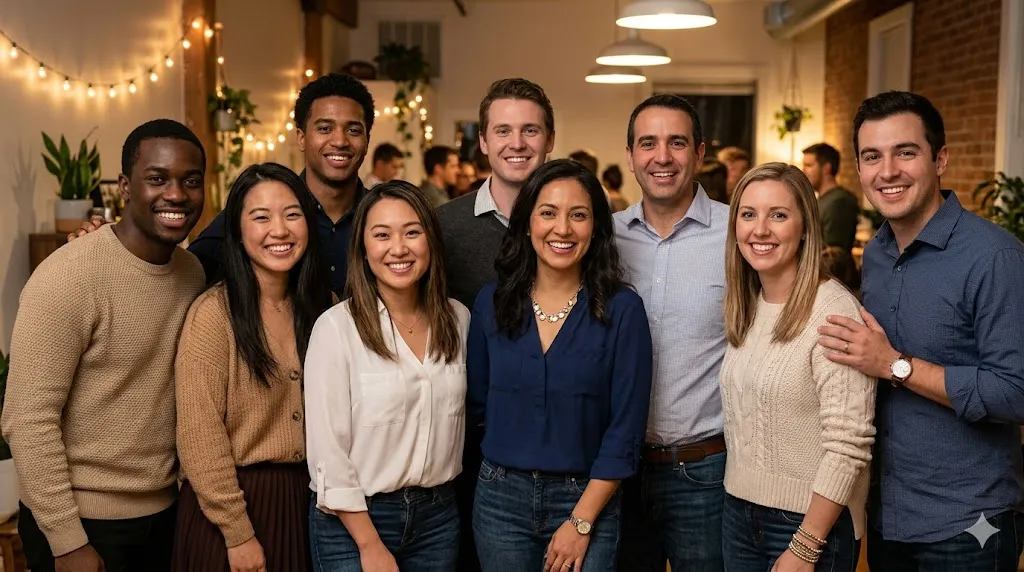
Best use case: Friend groups, event photos, family gatherings
Copy-paste prompt:
Fix the exposure in this group photo so all faces are evenly lit. Brighten faces that are underexposed without overexposing already-bright areas. Apply a natural, warm color balance. Do not change anyone's face, expression, or clothing. Remove minor red-eye if present. Slightly sharpen the overall image.
Why it works: “Without overexposing already-bright areas” prevents Gemini from blowing out highlights while brightening shadows.
Best follow-up prompt: “The person on the right is still slightly dark — brighten just their face area.”
Common mistake to avoid: Not specifying to preserve all subjects’ faces — Gemini may subtly alter some faces when adjusting exposure.
Prompt 17: Dating Profile Photo Enhancement

Best use case: Hinge, Bumble, or Tinder profile photo
Copy-paste prompt:
Enhance this photo for a dating profile. The goal is naturally attractive, not over-edited. Slightly brighten the face and eyes. Apply a warm, natural-looking color grade. Clean up the background if cluttered — simplify it while keeping it realistic. Preserve my exact face, expression, and body proportions. No skin smoothing beyond minor blemish cleanup. Crop to 4:5 vertical.
Why it works: “Naturally attractive, not over-edited” sets the right tone. Body proportion preservation prevents AI-related distortion.
Best follow-up prompt: “The background replacement doesn’t look realistic — make it a simple, slightly blurred outdoor park setting instead.”
Common mistake to avoid: Over-editing for dating profiles makes photos feel dishonest and can backfire.
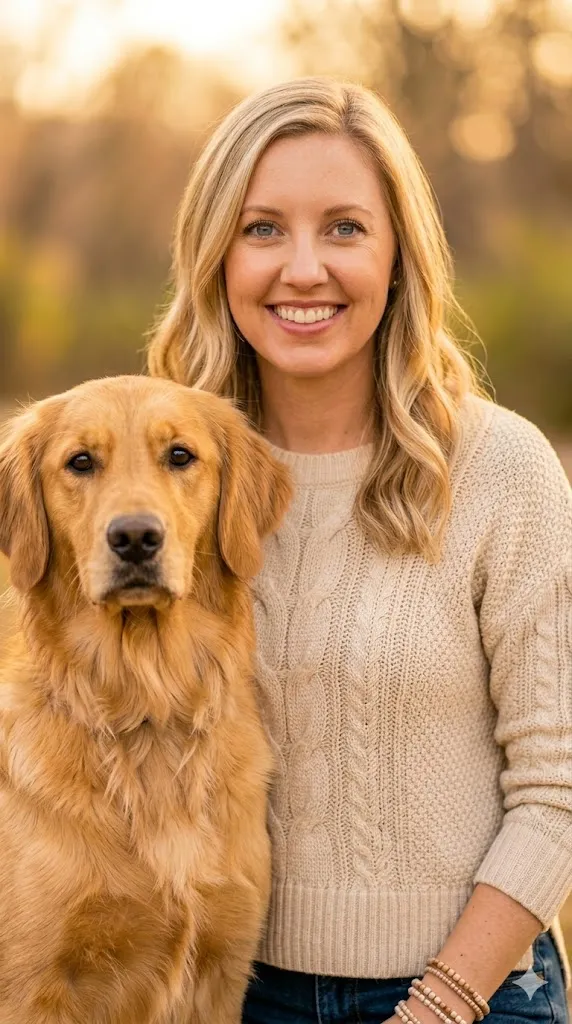
Prompt 18: Pet + Owner Portrait
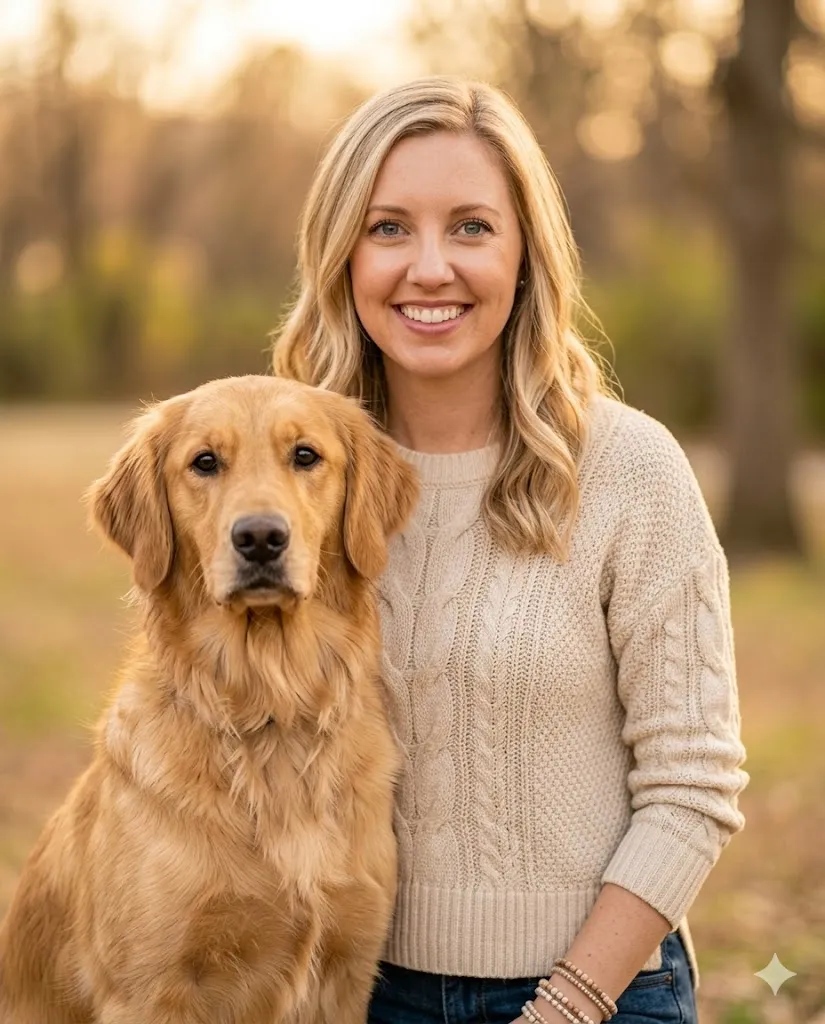
Best use case: Social media, holiday cards, personal keepsakes
Copy-paste prompt:
Edit this photo of me and my pet: balance the exposure so both the human and the animal are well-lit. Sharpen the pet's fur and eyes for detail. Apply a warm, cheerful color grade. Keep both subjects' appearance exactly as they are. Slightly blur the background for a portrait feel. No changes to the pet's fur color or pattern.
Why it works: Specifying the pet’s fur color/pattern as a constraint prevents unwanted changes to the animal’s appearance.
Best follow-up prompt: “The pet’s eyes look slightly different — make them match the original photo.”
Common mistake to avoid: Not mentioning the pet as a separate subject — Gemini may treat it as background.
Prompt 19: TikTok Thumbnail / Vertical Video Still
Best use case: TikTok, YouTube Shorts, Instagram Reels cover image
Copy-paste prompt:
Optimize this image for a TikTok thumbnail. Crop to 9:16 vertical format. Increase contrast and vibrancy slightly so it stands out in a feed. Make the subject's face clearly visible and well-lit. Clean up any distracting background elements. Keep the subject's appearance and expression identical.
Why it works: 9:16 ratio specification ensures platform-correct formatting. “Stands out in a feed” with “slightly” prevents over-editing.
Best follow-up prompt: “Add a slight warm glow around the subject to make them pop more against the background.”
Common mistake to avoid: Over-boosting vibrancy for thumbnails — it reads as cheap.
Prompt 20: Seasonal / Holiday Social Photo

Best use case: Holiday cards, seasonal social posts, December/July themed content
Copy-paste prompt:
Give this photo a warm, cozy holiday feel. Enhance any existing warm light sources. Add a subtle golden warmth to the overall image. If there are string lights or candles, make their glow slightly more prominent. Keep all subjects' faces and clothing exactly the same. No artificial snow, no added decorations — only enhance what is already there.
Why it works: “Only enhance what is already there” prevents Gemini from adding fantasy elements (falling snow, random ornaments) that look fake.
Best follow-up prompt: “The warmth is too heavy — reduce it by about 30% and bring back some cooler tones in the shadows.”
Common mistake to avoid: Asking Gemini to “add” holiday elements (e.g., “add snow”) — results usually look composited.
Gemini ai photo prompt copy paste for Product Photos, Ecommerce, and Ads (21–30)
Product photography demands accuracy above all — accurate colors, sharp textures, clean backgrounds, and legible labels. These prompts serve Amazon sellers, Etsy shop owners, Shopify merchants, and marketers who need studio-quality images without a professional studio setup. If you are exploring AI-powered alternatives for product photography, see our roundup of the best AI photo editors for side-by-side tool comparisons.
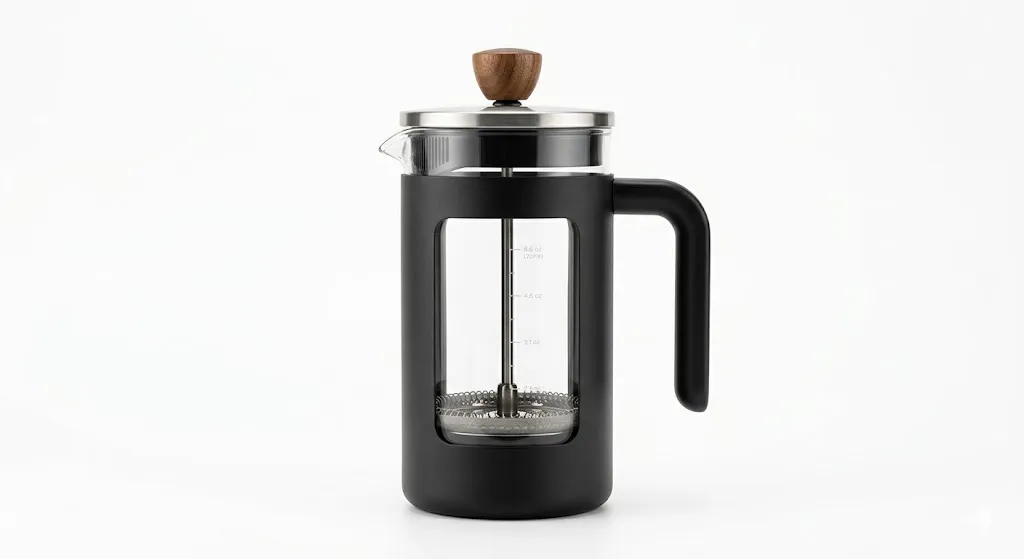
Prompt 21: Clean White Background Product Shot
Best use case: Amazon listing, Shopify store, product catalog
Copy-paste prompt:
Remove the background from this product photo and place the product on a clean, pure white background (#FFFFFF). The product should be lit with soft, even lighting from the front and slightly above. Keep all product details, textures, colors, and labels exactly as they are. No shadows, no reflections, no gradients. Sharp focus on the entire product.
Why it works: “#FFFFFF” removes ambiguity. “No shadows, no reflections” gives a standard ecommerce-clean result. “Sharp focus on the entire product” prevents portrait-style blur on product edges.
Best follow-up prompt: “Add a very small, soft drop shadow directly below the product to give it grounding.”
Common mistake to avoid: Not specifying “sharp focus on the entire product” — Gemini may apply portrait-style blur to parts of the product.
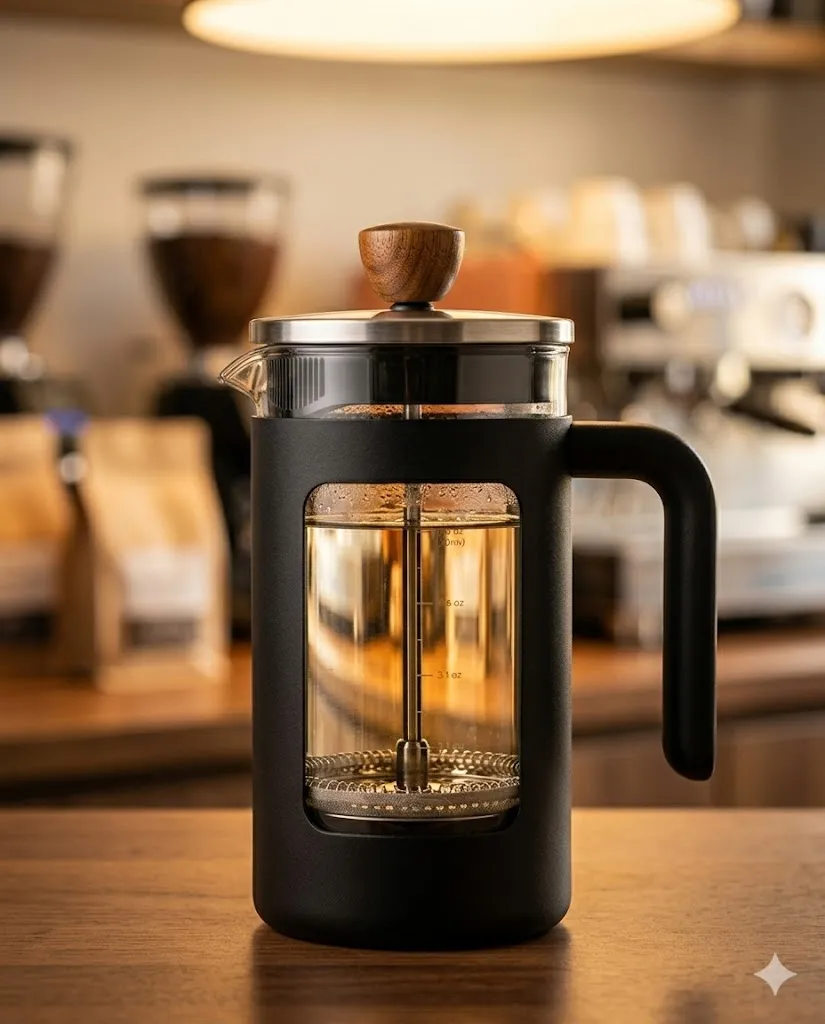
Prompt 22: Lifestyle Product Shot with Context

Best use case: Shopify hero image, brand social content, Pinterest
Copy-paste prompt:
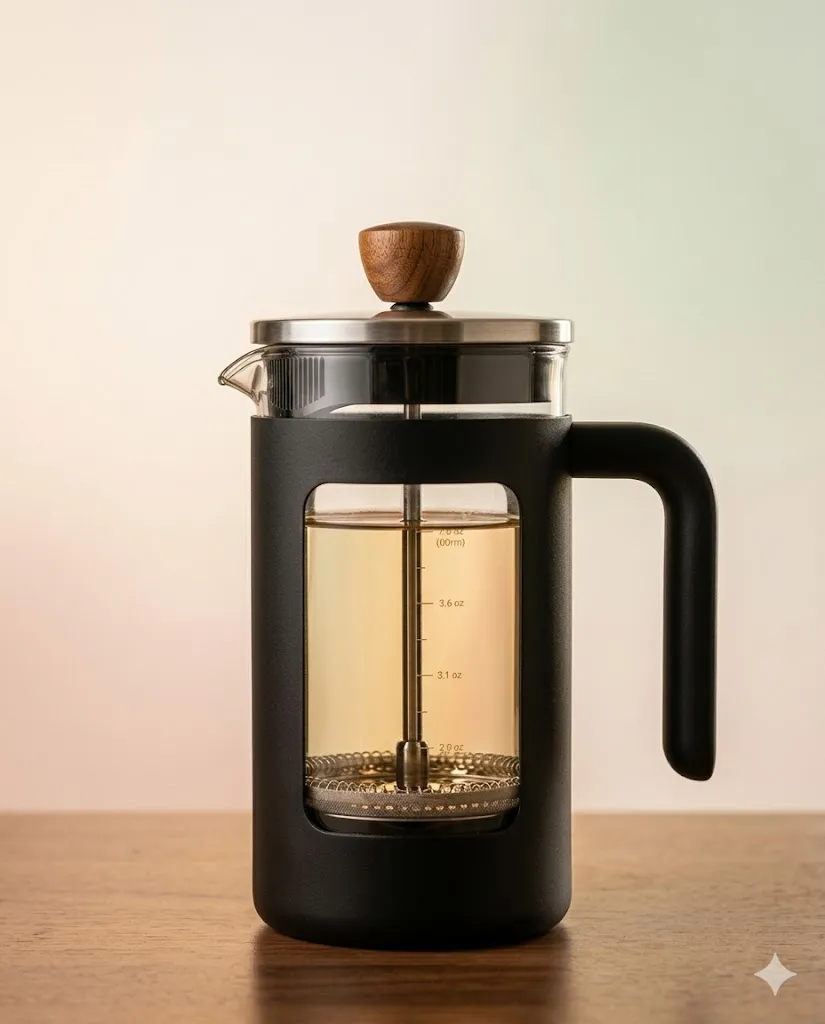
Place this product in a realistic lifestyle setting: on a clean marble countertop with soft natural window light coming from the left. Include subtle props (a plant, a linen napkin) in the background, slightly out of focus. Keep the product itself sharp, with accurate colors and textures. The overall feel should be clean, modern, and aspirational — like a magazine product feature.
Why it works: Specific surface material, light direction, and prop suggestions create a convincing scene. “Like a magazine product feature” sets a quality benchmark.
Best follow-up prompt: “Change the countertop to warm oak wood and remove the plant.”
Common mistake to avoid: Overloading the scene with props — keep it minimal for a premium feel.
Prompt 23: Amazon-Ready Product Image Enhancement
Best use case: Amazon, Walmart, eBay product listings
Copy-paste prompt:
Enhance this product image for an Amazon listing. Increase sharpness and clarity across the entire product. Boost color accuracy — the colors should look true-to-life. Ensure the background is pure white. The product should fill approximately 85% of the frame. Correct any white balance issues. No lifestyle elements, no text, no logos added.
Why it works: Amazon’s image requirements recommend the product filling 85%+ of the frame — specifying this helps with compliance.
Best follow-up prompt: “The reds in the product look slightly too saturated — pull them back to match the real product.”
Common mistake to avoid: Not mentioning “no text or logos added” — Gemini may add generated text.
Prompt 24: Food Photography Enhancement
Best use case: Restaurant menus, food blog, Uber Eats/DoorDash listings
Copy-paste prompt:
Enhance this food photo to look like professional food photography. Make the food colors vibrant and appetizing. Add a warm, slightly golden light to simulate a soft overhead softbox. Increase contrast in the food textures — crispy textures should look crispy, wet textures should look glistening. Keep the plating and arrangement exactly as they are. Slightly blur the background. Aspect ratio 4:5.
Why it works: Texture-specific instructions (“crispy should look crispy”) prevent Gemini from flattening food details.
Best follow-up prompt: “Add small steam wisps above the dish to make it look freshly served.”
Common mistake to avoid: Over-saturating food photos — reds and oranges become unappetizing quickly.
Prompt 25: Cosmetics / Beauty Product Close-Up
Best use case: Beauty brand, skincare listings, DTC product pages
Copy-paste prompt:
Enhance this beauty product photo. Capture the texture of the product surface (matte, glossy, dewy) with sharp detail. Apply soft, diffused lighting that avoids harsh reflections on the packaging. Make the label text crisp and legible. Place on a clean, soft pastel background that complements the product's brand colors. Keep exact product shape, colors, and branding.
Why it works: Beauty consumers buy based on texture and packaging feel — this prompt prioritizes both. “Crisp and legible” label text leverages Nano Banana 2’s improved text rendering.
Best follow-up prompt: “The glossy reflection on the cap is too harsh — soften it while keeping the overall glossy look.”
Common mistake to avoid: Forgetting to specify label text clarity — AI may blur or distort small text on packaging.
Prompt 26: Flat Lay Product Arrangement

Best use case: Instagram brand feed, lifestyle brand marketing, gift guides
Copy-paste prompt:
Edit this flat lay photo: balance the exposure across all items. Make each product equally sharp and well-lit. Apply a clean, bright aesthetic with slightly lifted shadows and a neutral white balance. Keep every product exactly as arranged — do not move, resize, or remove any item. Remove any visible dust or smudges on surfaces.
Why it works: “Do not move, resize, or remove any item” prevents Gemini from rearranging the composition.
Best follow-up prompt: “The white balance looks slightly cool — shift it 10% warmer.”
Common mistake to avoid: Asking for “better arrangement” — Gemini will try to rearrange items and usually makes it worse.
Prompt 27: Jewelry / Small Object Detail Shot

Best use case: Etsy, Poshmark, custom jewelry brands
Copy-paste prompt:
Enhance this jewelry photo for an online listing. Maximize sharpness on the metal surfaces and stones. Capture the sparkle and reflection without blowing out highlights. Use a soft, even light source that simulates a light tent. Background should be clean white or soft neutral. Show accurate metal color (silver, gold, rose gold). Keep exact product shape and proportions.
Why it works: “Simulate a light tent” is a specific photography term that Gemini interprets as diffused, even, wrap-around lighting.
Best follow-up prompt: “Increase the sparkle on the gemstone slightly without making it look like a lens flare.”
Common mistake to avoid: Not specifying metal color accuracy — Gemini may shift silver toward white or gold toward orange.
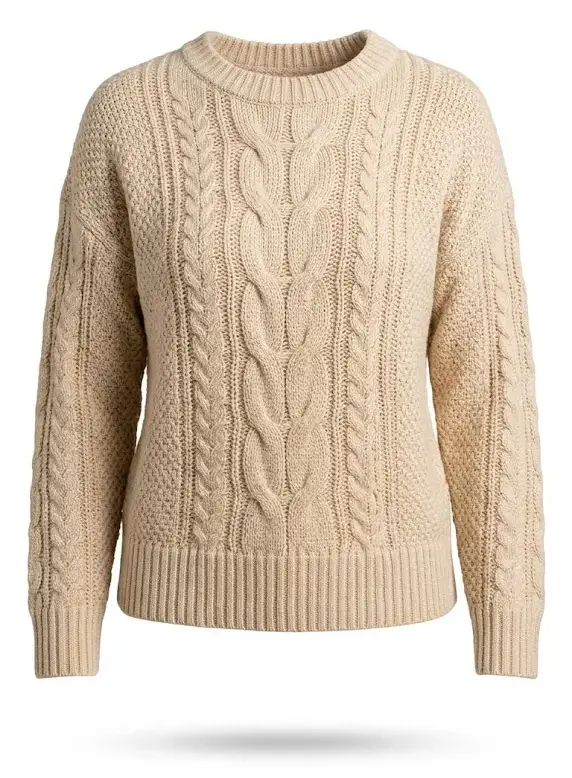
Prompt 28: Apparel / Clothing Product Photo
Best use case: Fashion ecommerce, resale listings (Poshmark, Depop), lookbooks
Copy-paste prompt:
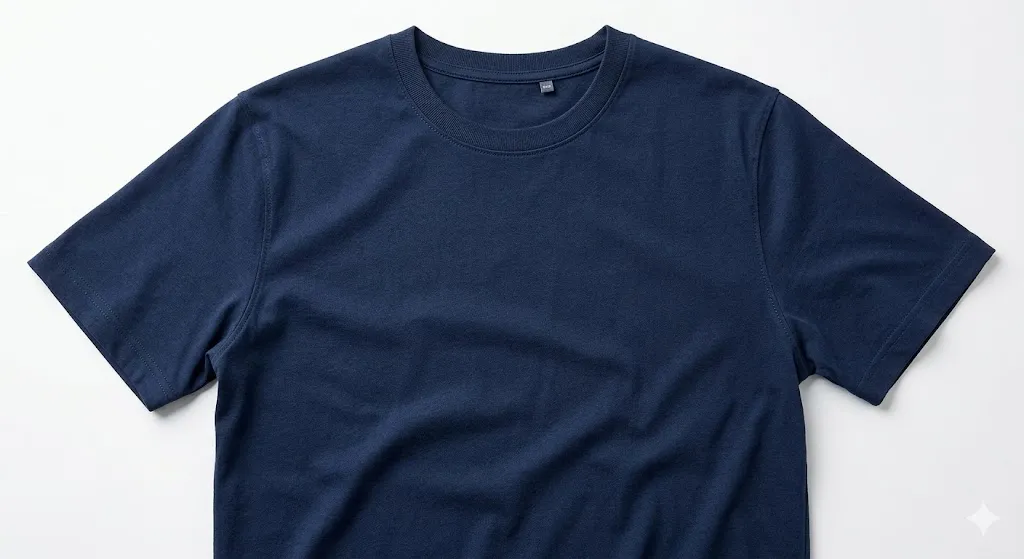
Enhance this clothing item photo for an ecommerce listing. Show accurate fabric color and texture — the weave, stitching, and material quality should be clearly visible. Apply soft, even studio lighting. If on a model, keep the model's appearance exactly the same. Clean white background. No wrinkles added, no color shifts from the original garment.
Why it works: Fabric texture and color accuracy are paramount for apparel. Specifying “weave, stitching, and material quality” prompts Gemini to preserve detail.
Best follow-up prompt: “There’s a slight color difference between the collar and the sleeve — unify the color to match the real garment.”
Common mistake to avoid: Not mentioning fabric texture preservation — Gemini may smooth out cable-knit, denim weave, or silk texture.
Prompt 29: Multi-Angle Product Composite
Best use case: Product listing hero image showing multiple views
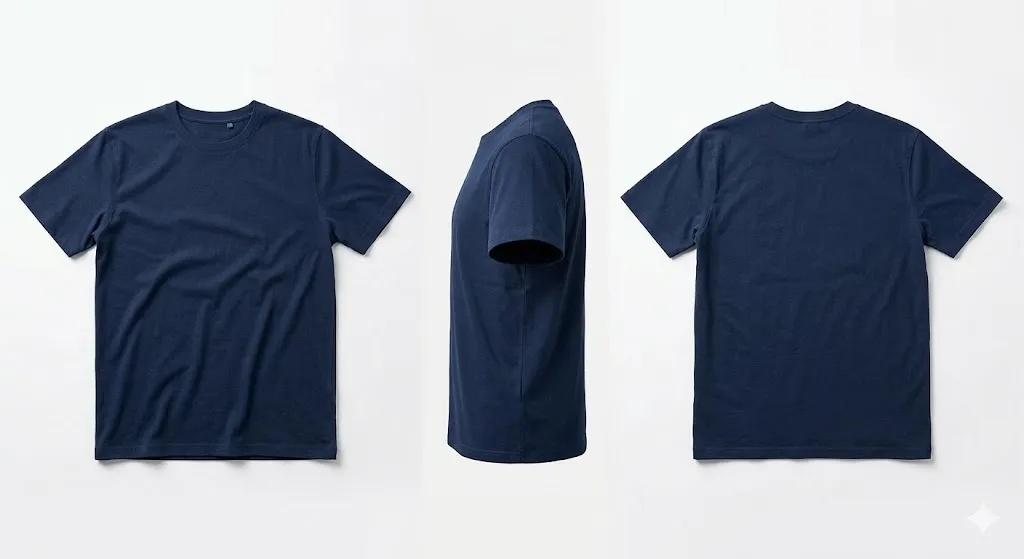
Copy-paste prompt:
Combine these images of the same product into a single composite showing front, side, and back views. Arrange them side by side on a clean white background with equal spacing. Match the lighting, exposure, and white balance across all views. Keep each view sharp and accurately colored. Add subtle drop shadows beneath each view for grounding.
Why it works: Uses Gemini’s multi-image blending capabilities. Specifying “match the lighting” ensures visual consistency.
Best follow-up prompt: “Make the spacing between views slightly wider and add small labels: ‘Front,’ ‘Side,’ ‘Back’ below each view.”
Common mistake to avoid: Uploading images with very different lighting — Gemini may struggle to normalize them.
Prompt 30: Product Photo with Text Overlay (Ad-Ready)

Best use case: Social media ads, promotional banners, sale graphics
Copy-paste prompt:
Create a promotional image using this product photo. Place the product on the right side of a clean, branded background. Add space on the left for text. Apply the following text in a clean, modern sans-serif font: "[Your headline here]" in large, bold white text. Below it, add "[Subheadline]" in smaller text. Make sure the text is sharp, legible, and well-positioned. Keep the product image accurate.
Why it works: Nano Banana 2’s improved text rendering makes in-image text more reliable. Specifying font style, color, and position reduces errors.
Best follow-up prompt: “Move the text 10% higher and increase the font size of the headline.”
Common mistake to avoid: Expecting pixel-perfect text layout — AI-generated text placement may need minor iteration.
Best Gemini Photo Editing Prompts for Cleanup, Restoration, and Background Changes (31–40)
Cleanup and restoration prompts handle the unglamorous but essential work: removing clutter, fixing exposure, restoring damaged photos, and replacing backgrounds. The key challenge in this category is preserving depth and texture in repaired areas — something that separates a convincing edit from an obvious one.
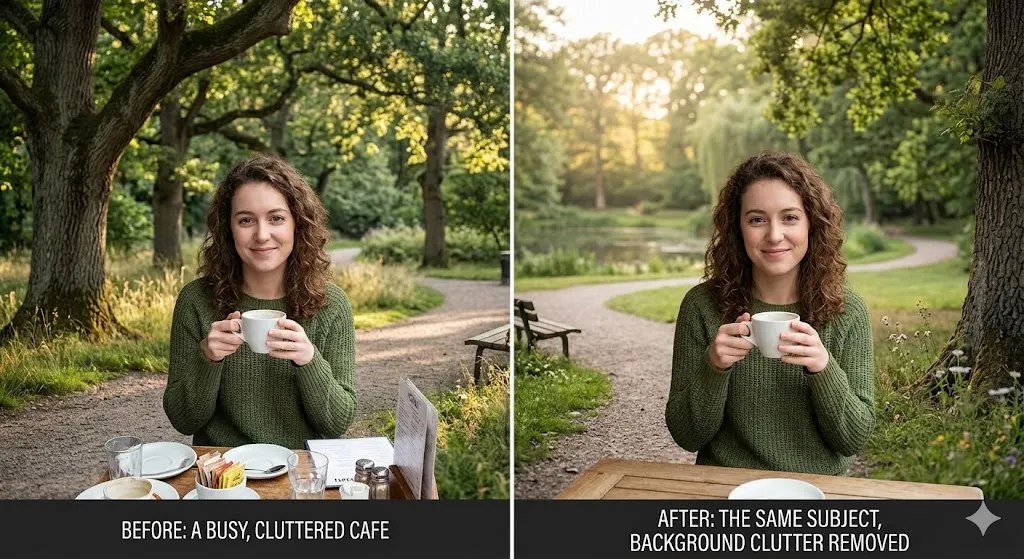
Prompt 31: Remove Background Clutter (Keep Subject Intact)
Best use case: Cleaning up a busy cafe, street, or home background
Copy-paste prompt:
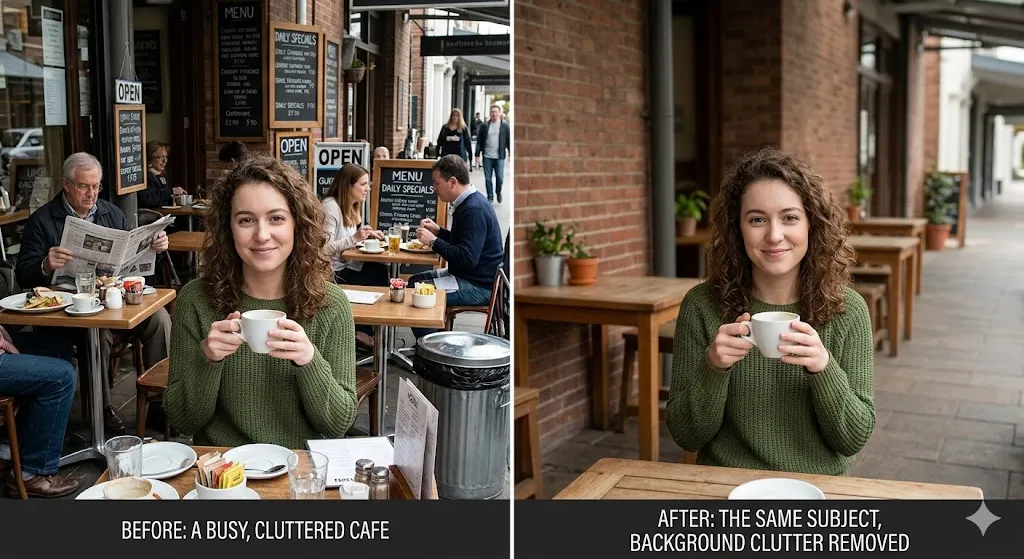
Remove all distracting background elements — people, signs, trash, clutter — while keeping the subject and the general environment intact. The cleaned areas should blend seamlessly with surrounding textures and lighting. Preserve the subject's face, clothing, and position exactly. No flattened depth, no smeared textures in the repaired areas.
Why it works: “No flattened depth” and “blend seamlessly with surrounding textures” prevent the patchy, over-smoothed repairs common with generic “clean the background” prompts.
Best follow-up prompt: “There’s a visible seam on the left side where a person was removed — blend it more naturally.”
Common mistake to avoid: Not specifying texture preservation — Gemini may fill removed areas with flat, textureless patches.
Prompt 32: Full Background Replacement (Realistic)
Best use case: Placing an indoor subject outdoors, or changing a setting entirely
Copy-paste prompt:
Replace the background with a realistic outdoor park scene with soft, diffused natural light and green foliage. Match the lighting direction and color temperature of the new background to the subject's existing lighting. Preserve the subject's exact appearance, including hair edges and clothing outlines. The transition between subject and new background should be seamless — no halos, no hard edges. No cartoonish or HDR-looking backgrounds.
Why it works: “Match the lighting direction and color temperature” solves the biggest problem in background replacement: mismatched light that makes the composite look pasted.
Best follow-up prompt: “The hair edges look too hard — soften them slightly to blend with the new background.”
Common mistake to avoid: Not specifying hair edge handling — AI struggles most with fine hair strands against new backgrounds.
Prompt 33: Old Photo Restoration
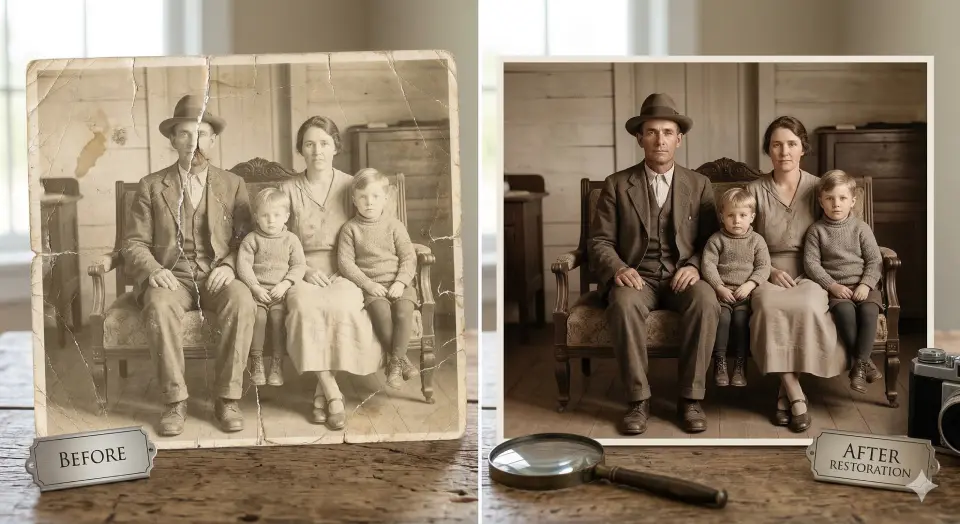
Best use case: Vintage family photos, damaged prints, faded images
Copy-paste prompt:
Restore this old photograph: repair visible cracks, scratches, tears, and stains. Restore faded colors to natural, lifelike tones without oversaturating. Sharpen faces and fine details gently. Keep the original composition, subjects, and framing exactly as they are. Do not modernize the clothing, hairstyles, or setting. Maintain the character of the original photo while making it look like a well-preserved print.
Why it works: “Maintain the character of the original” prevents Gemini from over-modernizing the image. “Well-preserved print” is a better anchor than “make it new.”
Best follow-up prompt: “The crack repair on the left side left a slightly blurred patch — sharpen it to match the surrounding detail.”
Common mistake to avoid: Asking to “make it look new” — the result often looks artificially modern instead of authentically restored.
Prompt 34: Fix Low-Light / Underexposed Photo
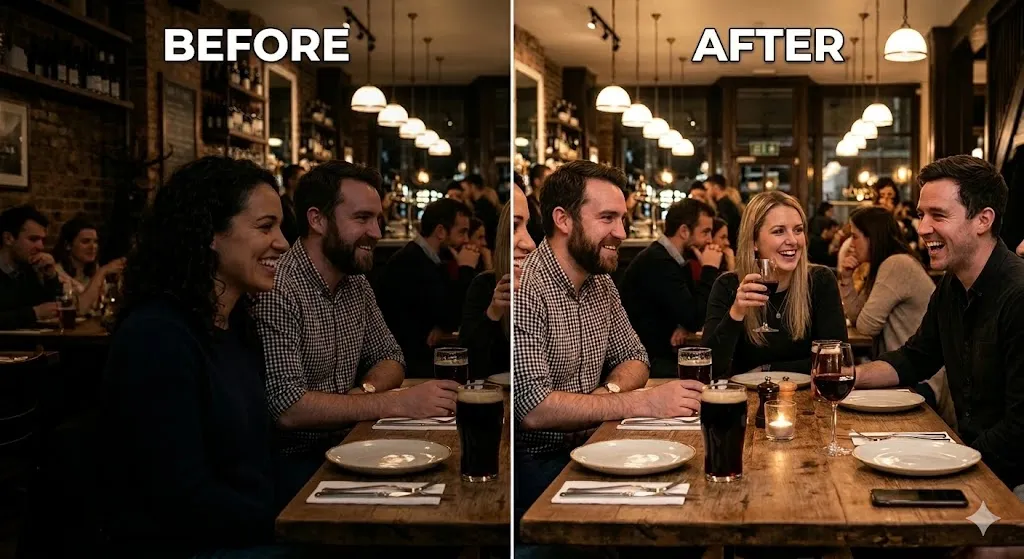
Best use case: Indoor event photos, evening candids, dimly lit restaurants
Copy-paste prompt:
Brighten this underexposed photo without introducing noise or grain. Lift the shadows to reveal detail in dark areas. Keep the highlights as they are to avoid blowing out bright spots. Maintain natural skin tones — do not shift them warm or cool. Preserve the existing mood and atmosphere. Slightly increase clarity for sharpness. No HDR effect, no unnatural-looking luminance.
Why it works: “Without introducing noise or grain” addresses the primary risk of brightening dark photos. The constraint on highlights prevents the overblown look.
Best follow-up prompt: “The shadow recovery is good, but the skin tones shifted slightly yellow — correct them back to neutral.”
Common mistake to avoid: Saying “make it brighter” without noise/highlight constraints — produces an HDR-looking mess.
Prompt 35: Sharpen a Slightly Blurry Photo
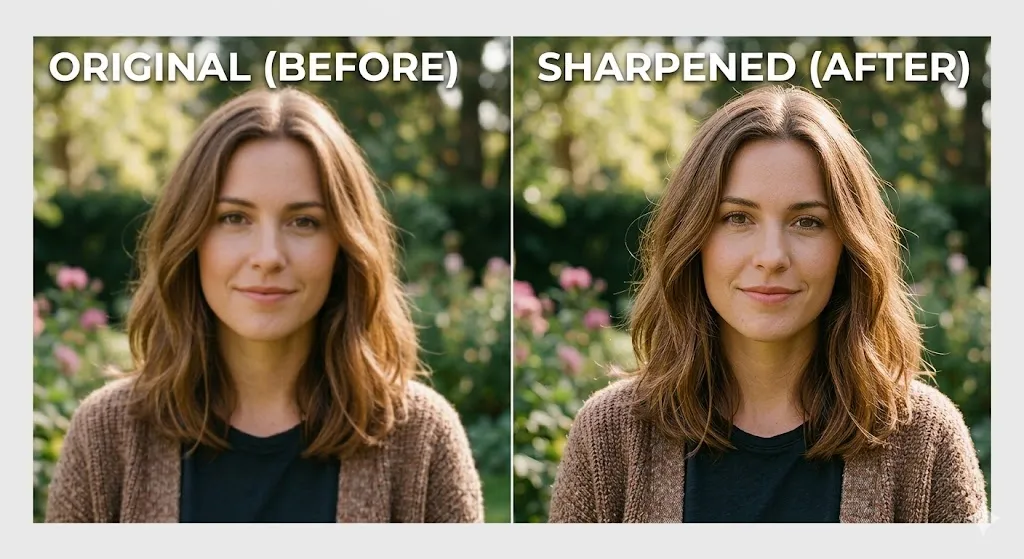
Best use case: Recovering mildly out-of-focus shots, camera shake correction
Copy-paste prompt:
Sharpen this photo to correct mild camera shake or soft focus. Increase edge detail and micro-contrast. Keep the background blur natural — only sharpen the subject. Do not add artificial sharpening halos or over-enhance edge contrast. Preserve natural skin texture if faces are present. No noise amplification.
Why it works: “No artificial sharpening halos” prevents the common over-sharpened look. Specifying “only the subject” prevents background sharpening that destroys natural bokeh.
Best follow-up prompt: “The sharpening is good but the edges have subtle halos — reduce them while maintaining the sharpness level.”
Common mistake to avoid: Asking for “maximum sharpness” — always aim for “natural-looking sharpness” instead.
Prompt 36: White Balance / Skin Tone Correction
Best use case: Photos shot under fluorescent, tungsten, or mixed lighting
Copy-paste prompt:
Correct the white balance in this photo. The image has a [yellow/blue/green] color cast — shift it to neutral daylight balance while preserving the natural warmth of skin tones. Whites should appear clean and neutral. Skin should look healthy and natural, not orange, pink, or gray. Keep all other elements the same.
Why it works: Specifying the color cast direction helps Gemini make the correct adjustment instead of guessing.
Best follow-up prompt: “The whites look good now, but the skin tone is slightly too pink — shift it closer to a natural warm tone.”
Common mistake to avoid: Over-correcting to “perfect neutral” — skin often needs slight warmth to look natural.
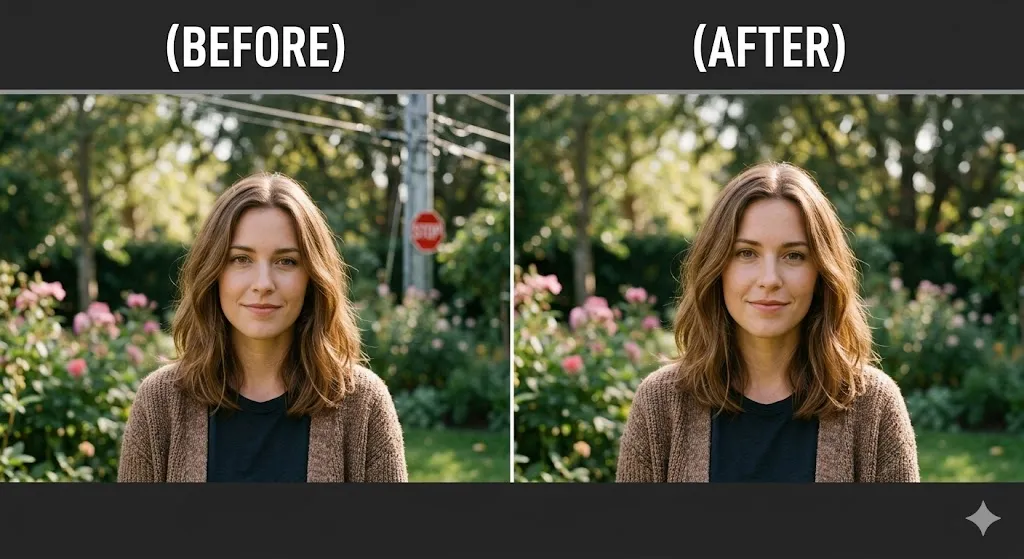
Prompt 37: Remove Unwanted Objects (Sign, Pole, Person)
Best use case: Travel photography cleanup, real estate photos, event shots
Copy-paste prompt:
Remove the [sign/pole/person/etc.] from this image. Fill the removed area with realistic content that matches the surrounding environment in terms of texture, color, lighting, and perspective. The repair should be invisible — no smearing, no repeated patterns, no obvious AI infill. Keep the rest of the image completely unchanged.
Why it works: Specifying “no repeated patterns” addresses a common AI infill artifact where the model tiles a texture patch.
Best follow-up prompt: “The removed area has a slightly different brightness than the surroundings — blend it to match.”
Common mistake to avoid: Not describing what the replacement should look like — leaving it to Gemini may produce unrealistic fills.
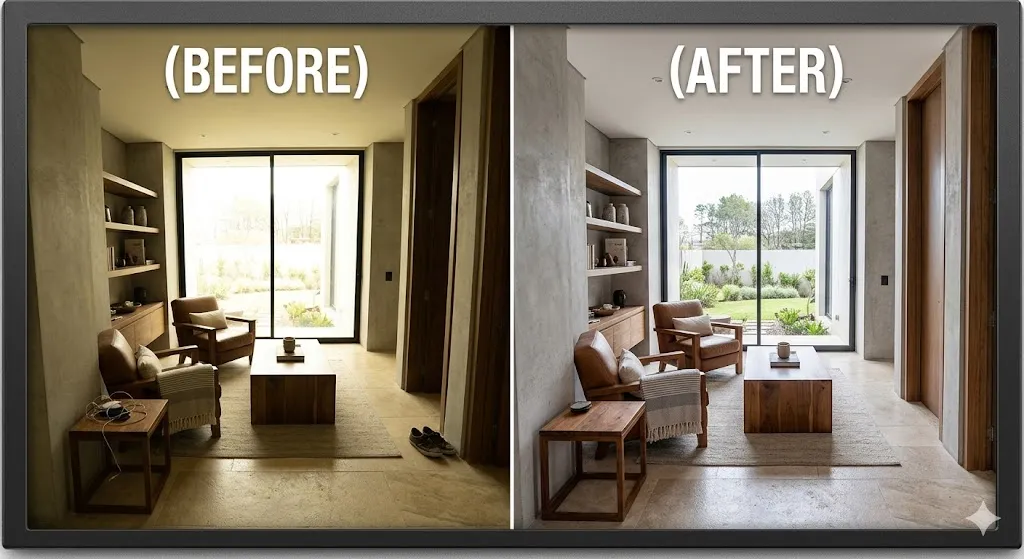
Prompt 38: Real Estate / Interior Photo Enhancement
Best use case: Zillow, Realtor.com, Airbnb listings
Copy-paste prompt:
Enhance this interior/real estate photo. Correct the exposure so windows are not overblown and dark corners have visible detail. Straighten any tilted vertical lines (buildings, walls, door frames). Apply a clean, bright, neutral color balance. Remove minor clutter if it does not substantially change the room layout. Sharpen architectural details. Keep the room's actual size, layout, and features accurate.
Why it works: “Straighten tilted vertical lines” addresses the distortion common in wide-angle interior shots. Practical accuracy is key for real estate.
Best follow-up prompt: “The window is still slightly blown out — bring back some outdoor detail visible through the glass.”
Common mistake to avoid: Over-enhancing to make rooms look unrealistically bright or spacious — misrepresentation can have legal implications for listings.
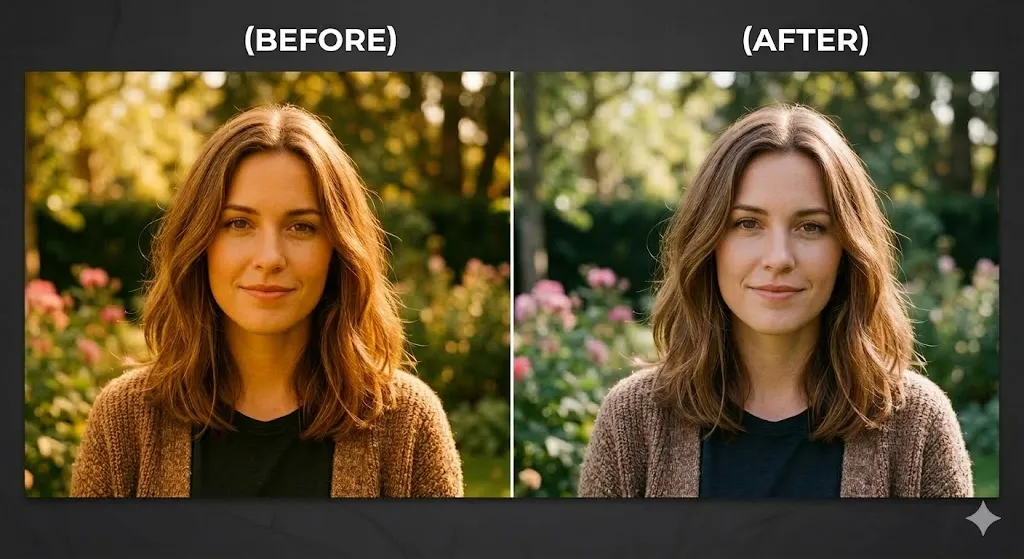
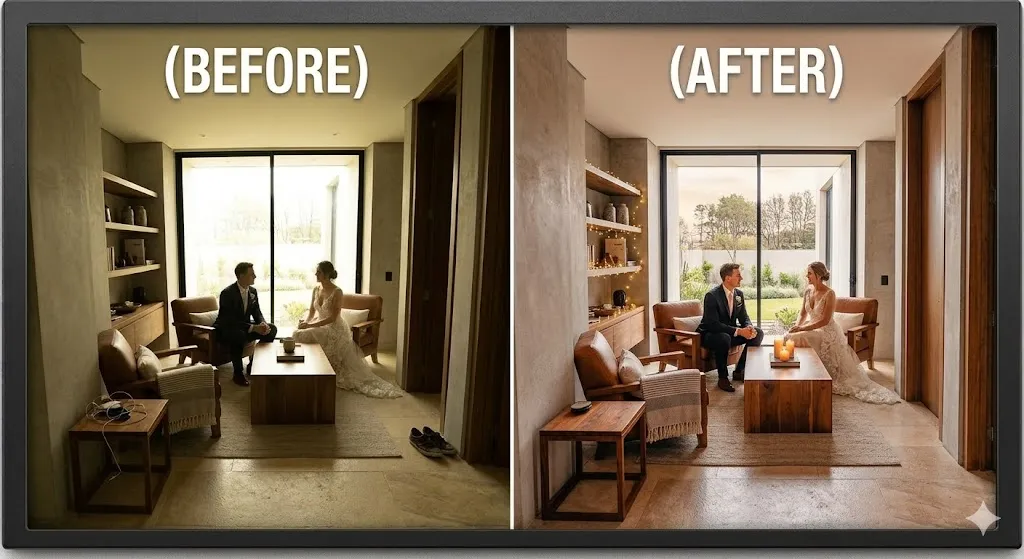
Prompt 39: Wedding Photo Color and Light Enhancement
Best use case: Reception photos, outdoor ceremony shots, candid moments
Copy-paste prompt:
Enhance this wedding photo: apply a romantic, warm color grade with soft highlights and creamy skin tones. Brighten any underexposed faces. Add a very subtle glow to highlights (candles, fairy lights, golden hour light). Keep all subjects' faces, expressions, and attire exactly the same. No heavy filters, no desaturated editorial look. The mood should feel warm, joyful, and timeless.
Why it works: “Creamy skin tones” and “timeless” prevent the model from applying trendy or overly stylized edits that don’t age well.
Best follow-up prompt: “The glow on the fairy lights is too strong — reduce it by half.”
Common mistake to avoid: Applying a trendy “dark and moody” preset to wedding photos — couples usually want warmth.
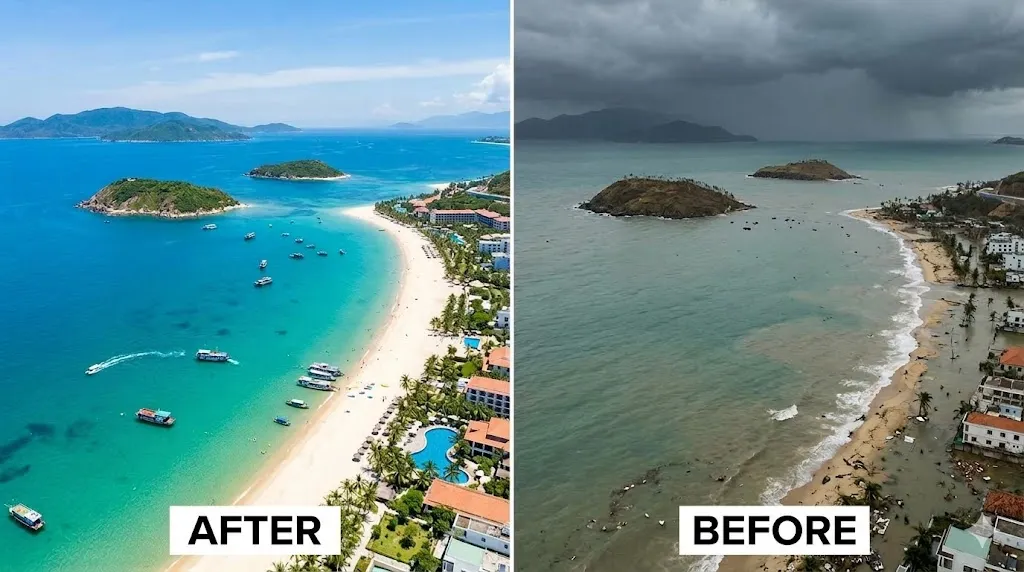
Prompt 40: Before-and-After Comparison Layout
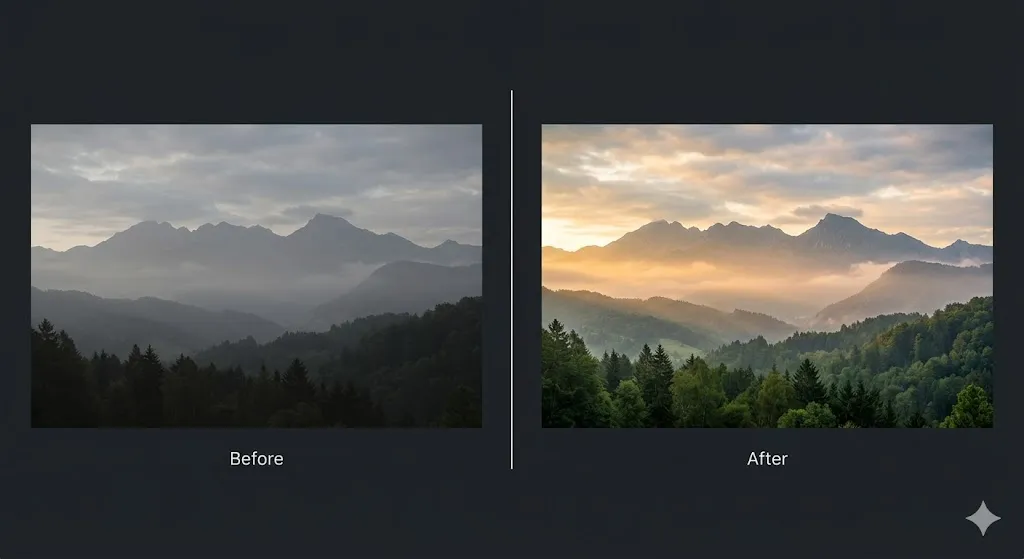
Best use case: Portfolio showcase, ads demonstrating editing results, social proof
Copy-paste prompt:
Create a side-by-side before-and-after comparison of this image. Place the original unedited photo on the left and the enhanced version on the right. Add a thin white divider line between them. Label "Before" on the left and "After" on the right in clean, small sans-serif text. The comparison should be on a clean white or dark background. Both images should be the same size and aligned.
Why it works: Leverages Nano Banana 2’s multi-image handling and text rendering for a clean, professional layout.
Best follow-up prompt: “Add a thin border around each image and change the labels to a slightly larger font.”
Common mistake to avoid: Not specifying alignment — the images may be mismatched in size or position.
Best Google Gemini Photo Editing Prompts for Cinematic and Artistic Looks (41–50)
Cinematic and artistic prompts go beyond correction into creative territory — film emulation, editorial color grading, and stylized treatments. The key to making these work is using specific visual references (film stock names, named color grades, era-specific looks) instead of generic terms like “cinematic” or “artistic.” This section covers the generative AI techniques that enable style transfer and creative image manipulation.
Prompt 41: Vintage Film Look (Kodak Portra 400)
Best use case: Lifestyle content, nostalgic personal photos, warm editorial
Copy-paste prompt:
Apply a Kodak Portra 400 film emulation to this photo. Warm, pastel-leaning color palette with slightly muted greens and boosted warm tones. Soft, lifted shadows with gentle highlight roll-off. Fine film grain. Slightly reduced contrast compared to digital. Keep all subjects exactly the same. The image should look like it was shot on 35mm film, not digitally filtered.
Why it works: Naming a specific film stock gives Gemini a well-documented visual reference. “Not digitally filtered” prevents over-stylization.
Best follow-up prompt: “Reduce the grain by half and slightly increase the contrast in the midtones.”
Common mistake to avoid: Adding too much grain — subtle grain looks analog, heavy grain looks noisy.
Prompt 42: Cinematic Teal-and-Orange Color Grade

Best use case: Travel content, outdoor portraits, dramatic landscapes
Copy-paste prompt:
Apply a cinematic teal-and-orange color grade to this image. Shadows should lean toward cool teal/blue-green. Highlights and skin tones should be warm orange/amber. Maintain natural-looking skin — the orange should enhance warmth, not turn skin orange. Slightly increase contrast and apply a subtle anamorphic letterbox crop (2.39:1 aspect ratio). No oversaturation.
Why it works: Specifying “the orange should enhance warmth, not turn skin orange” solves the most common failure with this popular grade.
Best follow-up prompt: “Pull back the teal in the shadows by 20% — it’s too heavy.”
Common mistake to avoid: Letting the orange overtake skin tones — specify natural skin as a priority.
Prompt 43: Classic Black-and-White Street Photography
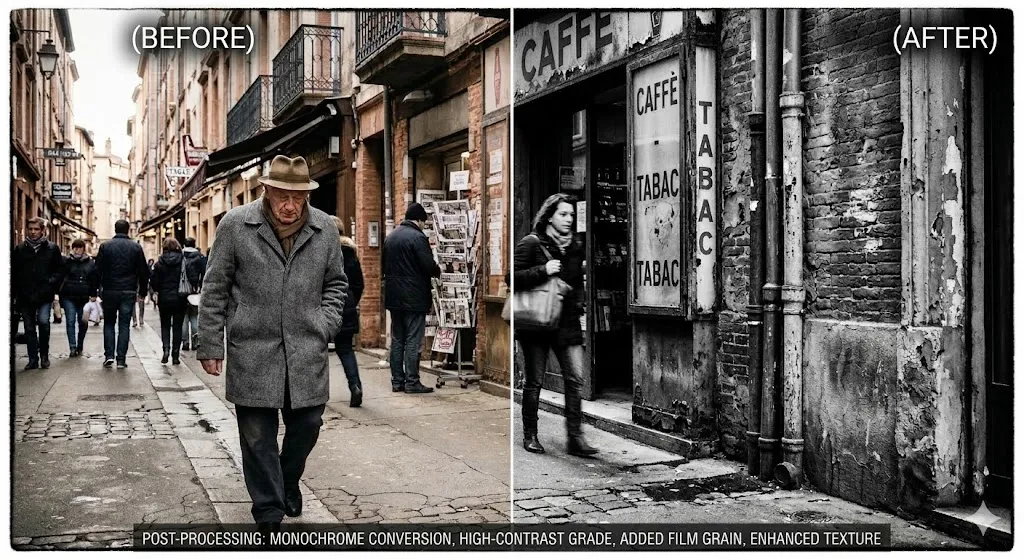
Best use case: Street photography, documentary style, portfolio pieces
Copy-paste prompt:
Convert this street photo to a high-contrast black-and-white image. Deep blacks, bright whites, strong tonal separation. Emphasize texture in surfaces (concrete, brick, metal, fabric). Preserve fine details in shadows and highlights. Slight vignette toward the edges. The feel should be gritty and authentic, like Tri-X 400 pushed one stop. Subtle grain.
Why it works: “Tri-X 400 pushed one stop” is a specific, well-known aesthetic reference. “Tonal separation” prevents a muddy grayscale conversion.
Best follow-up prompt: “Brighten the midtones slightly — the image is too dark.”
Common mistake to avoid: Not specifying contrast targets — generates flat, gray results.
Prompt 44: Polaroid / Instant Film Effect
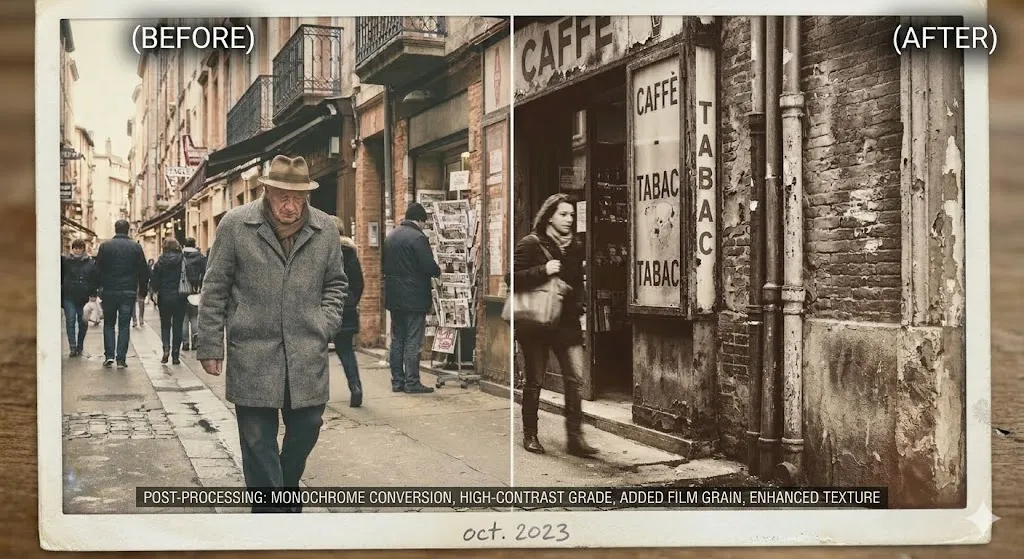
Best use case: Personal keepsakes, nostalgic social posts, creative projects
Copy-paste prompt:
Give this image a Polaroid instant-film look. Slightly faded colors with reduced saturation. Warm color cast, especially in the shadows. Soft, slightly hazy contrast. Add a white Polaroid-style border/frame around the photograph. The image area should have the slightly imperfect, warm quality of real instant film. No heavy filters, no digital-looking presets.
Why it works: “Slightly imperfect, warm quality” signals analog authenticity. The border instruction leverages Gemini’s image composition abilities.
Best follow-up prompt: “Make the white border slightly off-white/cream and add a very subtle light leak in the top-right corner.”
Common mistake to avoid: Using “Polaroid filter” — produces a generic digital preset look, not authentic instant film.
Prompt 45: Fashion Editorial (High-Fashion Look)
Best use case: Portfolio, lookbook, fashion brand marketing
Copy-paste prompt:
Edit this fashion photo in a high-fashion editorial style. Sharp subject with slightly desaturated, controlled color palette. Strong directional lighting with defined shadows. Skin should look clean but textured, not airbrushed. The background should complement but not distract from the clothing. Cool, slightly blue-tinted shadows. Overall feel: polished, intentional, magazine-ready.
Why it works: “Controlled color palette” and “polished, intentional” target the editorial look without the over-processed beauty filter effect.
Best follow-up prompt: “Increase the shadow depth slightly and make the highlights cooler.”
Common mistake to avoid: Over-smoothing skin for fashion — editorial work values visible texture and character.
Prompt 46: Soft Pastel / Magazine Cover Aesthetic
Best use case: Beauty content, feminine branding, wellness/lifestyle brands
Copy-paste prompt:
Apply a soft pastel aesthetic to this image. Muted, pastel color palette — soft pinks, lavenders, light blues. Reduce contrast and lift the blacks slightly for a dreamy, airy feel. Skin should look luminous and soft, but still have visible texture. Highlights should have a gentle, pearlescent quality. No heavy saturation, no bold primaries.
Why it works: Specifying “pearlescent highlights” and naming pastel hues gives Gemini a clear color vocabulary.
Best follow-up prompt: “The image is slightly too desaturated — bring back about 15% more color while keeping the pastel feel.”
Common mistake to avoid: Going too light and losing all contrast — dreamy should not mean washed out.
Prompt 47: Moody Dark and Dramatic
Best use case: Music artist promotion, dramatic portraits, thriller/noir aesthetics
Copy-paste prompt:
Apply a moody, dark color grade to this image. Deep shadows with minimal shadow recovery. Muted, desaturated colors with a slight blue-green tint in the shadows. Warm highlights on skin. Strong contrast. The key light should feel directional and dramatic — like a single strong light source. Preserve the subject's face and expression. No crushed blacks so dark that facial detail is lost.
Why it works: “No crushed blacks so dark that facial detail is lost” sets a practical floor on the darkness effect.
Best follow-up prompt: “Add a subtle rim light or edge highlight on the subject’s hair and shoulder.”
Common mistake to avoid: Going too dark and losing the subject entirely — mood should serve the subject, not hide them.
Prompt 48: Golden Hour / Sunset Warmth
Best use case: Outdoor portraits, engagement sessions, lifestyle brands
Copy-paste prompt:
Apply a golden-hour look to this photo as if shot during the last 30 minutes before sunset. Warm, golden light wrapping around the subject from behind or to the side. Soft lens flare or warm haze is acceptable if subtle. Skin should glow warmly without turning orange. Long, soft shadows. The background should have a warm, amber-toned sky if outdoors. Keep the subject's face and expression exactly the same.
Why it works: “Last 30 minutes before sunset” is a specific lighting condition that Gemini can interpret precisely. “Without turning orange” prevents the most common failure.
Best follow-up prompt: “The lens flare is too strong — reduce it to just a subtle warm haze.”
Common mistake to avoid: Over-warming skin tones — golden hour should glow, not look orange.
Prompt 49: Film Noir / Dramatic Low-Key Portrait
Best use case: Creative portfolios, dramatic character portraits, book covers
Copy-paste prompt:
Convert this portrait to a film noir style. High-contrast black and white. Hard, directional lighting creating strong shadows across the face. At least half the face should be in deep shadow. Background should be dark and minimal. Preserve the subject's facial features and expression in the lit areas. The overall mood should be mysterious and cinematic. Fine film grain. No flat lighting.
Why it works: “At least half the face should be in deep shadow” gives Gemini a specific lighting ratio to work with, preventing timid half-measures.
Best follow-up prompt: “Add a subtle venetian blind shadow pattern across the background.”
Common mistake to avoid: Not specifying how much shadow you want — Gemini defaults to moderate shadow, not true noir.
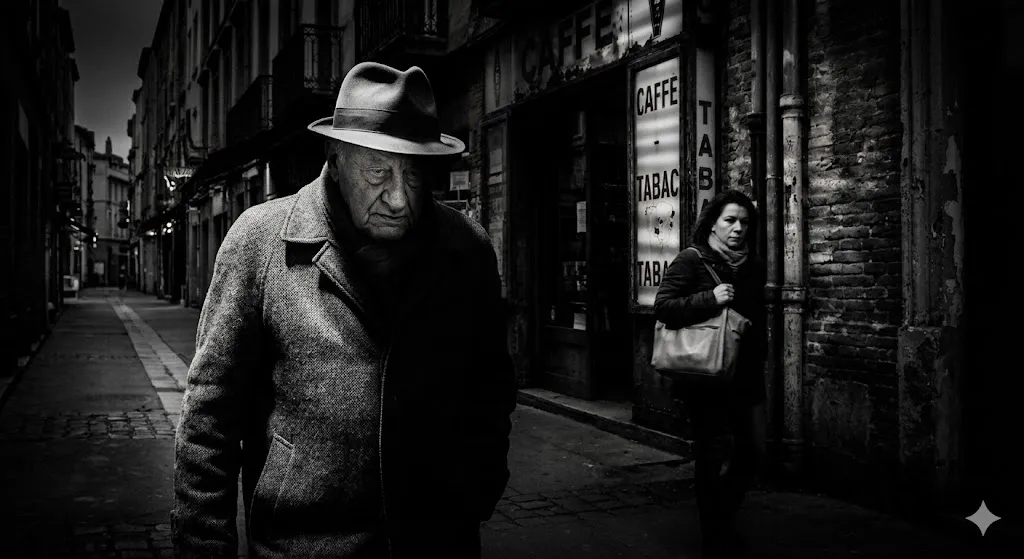
Prompt 50: Surreal / Double Exposure Creative Blend
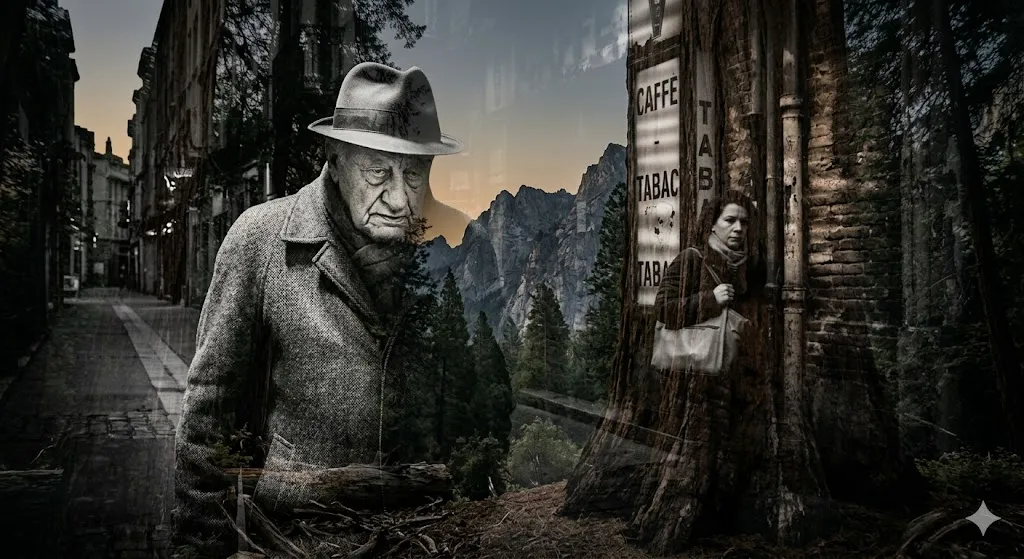
Best use case: Album covers, creative portfolio, social media art posts
Copy-paste prompt:
Create a double-exposure effect blending this portrait with a nature landscape. The landscape textures (trees, mountains, sky) should show through the subject's silhouette and darker areas. The subject's face should remain clearly recognizable in the lighter areas. Tonal range should be balanced — neither element should fully overpower the other. Muted, slightly desaturated color palette. The effect should look intentional and artistic, not like a software glitch.
Why it works: “The subject’s face should remain clearly recognizable” prevents the common issue where double-exposure effects obscure the subject entirely.
Best follow-up prompt: “Make the landscape texture more visible in the hair area and less visible across the face.”
Common mistake to avoid: Not prioritizing which element dominates — without guidance, the two images compete and the result is muddled.
Best Prompts by User Type
Different users have different editing priorities. This quick reference maps prompt categories to real-world roles.
| User Type | Best Prompt Numbers | Top Priority |
|---|---|---|
| Content creators | 11–20, 41–50 | Social media formatting, cinematic looks, platform-ready crops |
| Marketers & brand managers | 21–30, 40 | Product accuracy, white-background compliance, ad-ready text overlays |
| Ecommerce sellers | 21–28 | Color accuracy, texture detail, marketplace image compliance |
| Portrait photographers | 1–10, 39 | Lighting control, skin retouching, identity preservation |
| Small business owners | 1, 5, 8, 10, 21, 38 | LinkedIn headshots, team page consistency, product shots, real estate |
| Hobbyists & families | 12, 13, 18, 20, 33, 34 | Couple photos, travel, pet portraits, holiday edits, old photo restoration |
Why Your Gemini AI Images Still Look Fake
Even well-crafted prompts can produce unconvincing results. In most cases, the problem falls into one of ten recurring patterns. This troubleshooting table identifies each issue, explains why it happens, and gives you the exact language to fix it.
| Problem | Why It Happens | How to Fix |
|---|---|---|
| Waxy, plastic skin | Over-smoothing from vague retouching prompts | Add “preserve natural skin texture, pores, and fine lines” |
| Face looks different | Identity drift during complex edits | Add “preserve the subject’s exact facial features.” Edit background first, face last. |
| Flat, lifeless lighting | No light direction in prompt | Specify light direction: “soft light from the left” or name a style (Rembrandt, butterfly) |
| Oversaturated colors | Using “make colors pop” or “vibrant” without limits | Use “natural color accuracy” or specify exact tonal shifts |
| Background looks pasted | Lighting mismatch after background replacement | Add “match the lighting direction and color temperature of the new background to the subject” |
| Cartoonish / AI look | Overprompting or conflicting style instructions | Simplify. Use fewer style keywords. Add negative prompt: “no cartoonish look, no AI artifacts” |
| Blurry subject | Subject blends into background blur | Specify “keep the subject perfectly sharp from [hairline to shoulders]” |
| Wrong aspect ratio | No crop guidance | Always specify aspect ratio: 4:5 (Instagram portrait), 1:1, 16:9, 9:16, 2.39:1 (cinematic) |
| Repeated pattern artifacts | AI in-painting uses tiled textures | Follow up: “the repaired area has a repeated pattern — fill it with varied, natural-looking texture” |
| Text is garbled | Text rendering limitations | Use Nano Banana 2 or Pro. Keep text short. Specify font and size. Review and iterate. |
The Three-Pass Rule
If a single prompt does not produce a clean result, use this three-pass approach:
- Pass 1: Core edit (background, lighting, or primary change)
- Pass 2: Refinement (fix specific areas that look off)
- Pass 3: Polish (final color, sharpness, and constraint check)
This works because follow-up prompts in the same Gemini conversation are contextual — the model knows what it already changed. The same iterative principle applies in other AI tools; if you have used ChatGPT image editing prompts, you will recognize a similar multi-pass workflow.
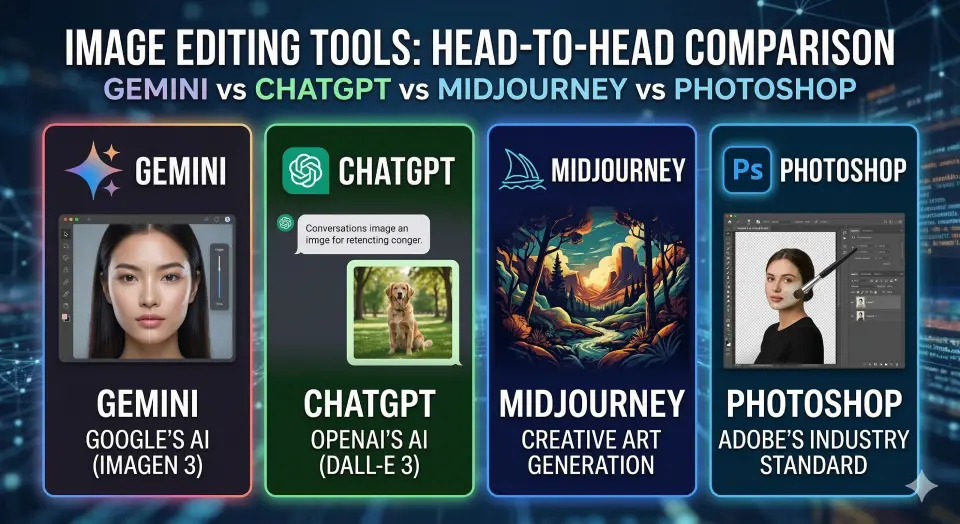
Gemini vs ChatGPT vs Midjourney vs Photoshop
Different tools serve different purposes. This comparison focuses on practical photo editing strengths as of early 2026. For a broader view of AI-powered editing options beyond these four, see our ranked list of the best AI image generators.
| Feature | Google Gemini (Nano Banana 2/Pro) | ChatGPT + DALL-E 3 | Midjourney v6 | Adobe Photoshop (w/ Firefly) |
|---|---|---|---|---|
| Image-to-image editing | Yes (upload and edit) | Yes (via ChatGPT) | Limited (image references, not true editing) | Yes (Generative Fill, in-app) |
| Identity preservation | Good with explicit prompts | Moderate — can drift | Not designed for this | Excellent (layer-based) |
| Text in images | Improved (Nano Banana 2) | Moderate | Poor | Excellent (native text tool) |
| Background removal | Good | Good | Not a core feature | Excellent |
| Photorealistic quality | High (Nano Banana Pro) | High | Very high (artistic focus) | Very high (precision control) |
| Batch / consistency | Moderate (character consistency) | Limited | Strong (style lock) | Manual but precise |
| Ease of use | Very easy (conversational) | Very easy (conversational) | Moderate (Discord-based) | Steep learning curve |
| Price | Free tier available; Advanced for Pro features | Free tier + Plus/Pro | Subscription-only, no free tier | $22.99/month (Photography plan, verify current pricing) |
| Best for | Quick edits, conversational iteration, multi-image blending | Creative generation + editing in one chat | Artistic / stylized image creation | Pixel-precise professional retouching |
When to Use Gemini
- You need a quick, conversational photo edit without opening desktop software.
- You want to iterate with follow-up prompts in natural language.
- You need multi-image blending or side-by-side composites.
- You want to leverage Google Photos integration (Ask Photos).
For a full breakdown of Google Gemini’s broader capabilities — including text, code, and research features — see our Google Gemini review.
When to Use Something Else
- Pixel-precise edits (hair strand masking, frequency separation retouching): Use Adobe Photoshop or Adobe Lightroom.
- Highly stylized artistic imagery (fantasy, concept art, illustration): Use Midjourney.
- Creative image generation with strong DALL-E integration: Use ChatGPT.
- Quick social media graphics with templates: Use Canva.
- Automated AI photo enhancement with sliders: Use Skylum Luminar.
For a broader comparison of AI-powered tools across writing, image, and video, see our guide to the best AI tools for content creation. For a direct prompt-by prompt comparison of Gemini against ChatGPT, Midjourney, and Adobe Firefly for photo editing specifically, see our AI photo editing prompts comparison.
Gemini ai photo prompt copy paste – FAQs
Can Google Gemini edit uploaded photos?
Yes. In Gemini Apps (web and mobile), you can upload a photo directly into the conversation and then instruct Gemini to edit it — change the background, adjust lighting, retouch skin, remove objects, or apply color grading. This is the image-to-image editing workflow, distinct from generating a new image from scratch. You can also upload multiple images to create composites or blended outputs.
What is the best Gemini prompt for realistic photos?
The best Gemini prompt for realistic photos includes at least five elements: a clear subject description, a specific editing action, style references (e.g., “editorial portrait”), technical details (lens, lighting), and negative constraints (“no cartoonish look, no plastic skin”). See Prompt 1 (Corporate Headshot) or Prompt 4 (Gentle Skin Retouch) for copy-paste examples.
How do you keep the face the same in Gemini?
Add explicit identity-preservation language to every portrait prompt: “Preserve the subject’s exact facial features, skin tone, and expression.” Avoid stacking too many changes in a single prompt — edit the background first, refine the subject second. If identity drift occurs, follow up with: “Revert the face to match the original uploaded photo exactly.”
Is Google Gemini free for photo editing?
Google Gemini offers a free tier that includes image generation and editing capabilities with downloads up to 1K resolution. To access Nano Banana Pro (up to 2K downloads, better consistency), generate an image with Nano Banana 2 first, then select “Redo with Pro” from the three-dot menu. This requires an AI Plus, Pro, or Ultra subscription. Check Google’s current plans page for the latest pricing and feature tiers.
Can Gemini combine multiple images?
Yes. Gemini supports multi-image input — you can upload multiple photos and ask the model to combine, composite, or reference them together. This is useful for product multi-angle composites (see Prompt 29), before-and-after comparisons (Prompt 40), and double-exposure creative effects (Prompt 50).
What is Nano Banana 2 and how is it different from Nano Banana Pro?
Nano Banana 2 is Google’s image generation model available to all Gemini users. It introduced improved text rendering, local edits, and stronger instruction following. Nano Banana Pro is a premium upgrade — you first generate an image with Nano Banana 2, then select “Redo with Pro” from the three-dot menu.
This option is available to AI Plus, Pro, or Ultra subscribers and offers higher-resolution downloads (up to 2K vs. 1K on the free tier), better character consistency, and more refined photorealistic output.
For 50 production-ready prompt frameworks specifically optimized for Nano Banana Pro — covering portraits, product shots, style transfers, and text rendering — see our Nano Banana Pro prompts guide. Feature availability is subject to updates — check Google’s Gemini Help for the latest details.
Why do my Gemini images look fake?
The most common reasons are: overprompting (too many conflicting instructions), missing constraints (no negative prompts), lack of lighting direction, no identity-preservation language, and skipping follow-up refinement prompts. See the troubleshooting section for a full breakdown with fixes for each issue.
Can I use Gemini-edited photos commercially?
Usage rights depend on Google’s Terms of Service and the specific terms of your Gemini plan. For commercial use (ecommerce, ads, marketing), review Google’s current policies regarding AI-generated and AI-edited content. Additionally, consider platform-specific rules (e.g., marketplace image requirements) and any applicable disclosure requirements.
What is the difference between image generation and image editing in Gemini?
Image generation creates a new image from scratch based on a text description. Image editing (image-to-image) modifies an existing photo you upload — retouching, background replacement, color grading, object removal, and more. Most prompts in this article are designed for editing, though many also work for generation.
How does Google Photos Ask Photos relate to Gemini?
Ask Photos is a feature within the Google Photos ecosystem that uses AI to search, organize, and perform some edits on your photo library. It leverages Gemini-family models but operates within the Google Photos experience rather than the standalone Gemini Apps interface. Availability may depend on device, region, and account type — check Google’s Photos Help pages for the latest on supported experiences.
Final Verdict
Google Gemini’s photo editing capabilities have matured significantly through 2026 with Nano Banana 2 and Nano Banana Pro. The model handles portrait retouching, background replacement, product photography cleanup, and creative color grading well — when prompted correctly.
The difference between a usable result and a fake-looking one is almost always the prompt. Use the six-part framework (Subject + Action + Context + Style + Technical Details + Constraints), include negative prompts, preserve identity explicitly, and iterate with follow-up prompts instead of packing everything into one instruction.
Save these Gemini photo editing prompts by category:
- Prompts 1–10 for professional headshots and portraits
- Prompts 11–20 for social media, selfies, and lifestyle content
- Prompts 21–30 for product photography and ecommerce
- Prompts 31–40 for cleanup, restoration, and background editing
- Prompts 41–50 for cinematic and artistic creative looks
No single AI editor replaces Photoshop for pixel-level precision or Midjourney for stylized art. But for the everyday editing work that most creators, marketers, and small businesses actually need, Gemini photo editing prompts built on a solid framework will get you there faster than most alternatives — and without the learning curve.
About the author
I’m Macedona, an independent reviewer covering SaaS platforms, CRM systems, and AI tools. My work focuses on hands-on testing, structured feature analysis, pricing evaluation, and real-world business use cases.
All reviews are created using transparent comparison criteria and are updated regularly to reflect changes in features, pricing, and performance.